washing instructions for bernat blanket yarn

Understanding Bernat Blanket Yarn

Bernat Blanket yarn, being 100% polyester, offers convenient care; it’s machine washable and dryable, but always follow the care instructions!

Generally, a delicate cycle with cold water and low heat drying is recommended to maintain its softness and prevent unwanted changes․

Always check the skein wrapper for specific instructions, as variations may exist, and gentle handling is key for longevity․

What is Bernat Blanket Yarn?

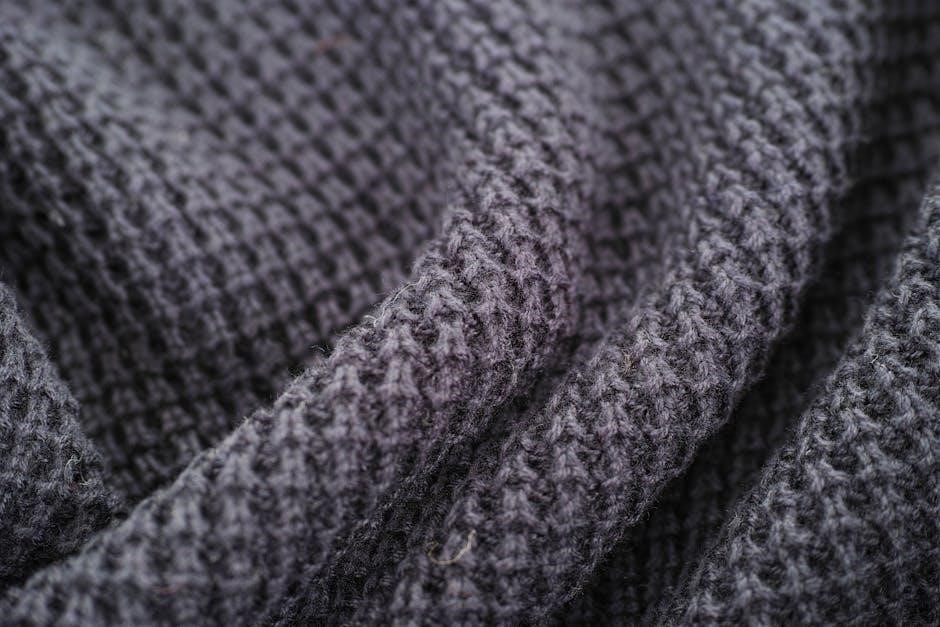
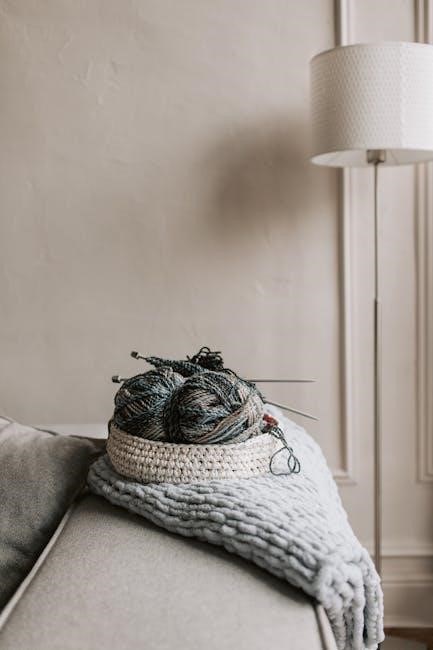
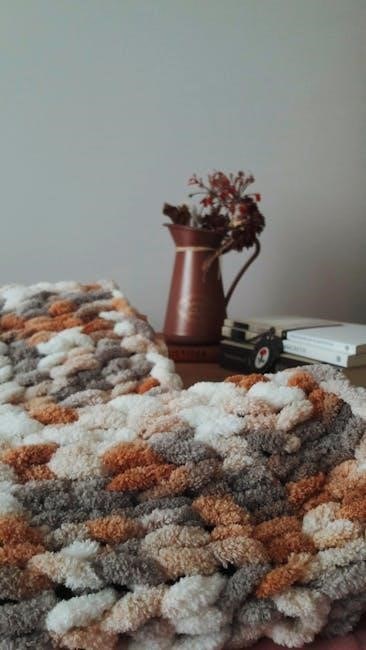
Bernat Blanket Yarn is a chenille-style yarn celebrated for its incredibly soft texture, making it a favorite for creating cozy and comforting projects․ It’s particularly popular for blankets, throws, and other home décor items where a plush feel is desired․

However, understanding its composition is crucial for proper care․ Being 100% polyester, it differs from natural fibers like wool or cotton, influencing how it should be washed․ While machine washable, gentle handling is paramount․

The yarn’s construction—a soft fiber wrapped around a core—means it can be susceptible to changes if not treated correctly․ Following the manufacturer’s care instructions, typically found on the yarn label, is essential to prevent felting, pilling, or color bleeding․ It’s a versatile yarn, but mindful washing ensures lasting softness․

Composition and Characteristics

Bernat Blanket Yarn’s defining characteristic is its 100% polyester composition, which grants it machine washability – a significant advantage for crafters․ This synthetic fiber provides exceptional softness and a luxurious, plush texture, ideal for comforting projects․

However, polyester’s response to heat is a key consideration when washing․ High temperatures can cause the fibers to felt or shrink, altering the yarn’s texture․ Therefore, cold water is consistently recommended․

The yarn’s structure, with soft fibers enveloping a core, also means it can be prone to pilling․ Gentle cycles and mild detergents help minimize this․ Always prioritize following the care instructions on the label to preserve the yarn’s quality and appearance․

Washing Bernat Blanket Yarn: A Comprehensive Guide

Bernat Blanket yarn is conveniently machine washable, but careful attention to water temperature and cycle selection is crucial for maintaining its softness and shape․

Initial Considerations Before Washing

Before initiating the washing process, several key considerations will ensure the best outcome for your Bernat Blanket yarn projects․ Always prioritize checking the yarn’s label; manufacturer instructions supersede general guidelines․ Assess the project’s size and construction – larger items like blankets may require commercial washing machines․

Pre-treat any visible stains gently, avoiding harsh chemicals that could damage the polyester fibers․ Consider hand washing smaller, delicate items or those with intricate details․ Remember, while machine washing is generally safe, it’s not without potential risks like pilling or felting if precautions aren’t taken․

Separate Bernat Blanket yarn items from other laundry to prevent color transfer or snagging․ A mesh laundry bag can provide extra protection during the wash cycle, especially for delicate pieces․

Checking the Yarn Label for Specific Instructions

The yarn label is your primary source of truth regarding Bernat Blanket yarn care․ While generally machine washable, specific variations or dye lots might have unique requirements․ Look for symbols or written instructions detailing water temperature, washing cycle, and drying methods․

Pay close attention to warnings against bleaching or dry cleaning, as these can damage the polyester fibers․ The label often specifies a delicate cycle and low heat tumble drying․ If the label is missing or illegible, err on the side of caution and test a small swatch first․

OEKO-TEX certification, often indicated on the label, assures the yarn is free from harmful substances, but doesn’t alter washing guidelines․ Always prioritize the manufacturer’s recommendations for optimal results․

Machine Washing Bernat Blanket Yarn

Bernat Blanket yarn thrives with machine washing! Utilize a delicate or gentle cycle, always with cold water, to preserve its texture and prevent potential issues․

Avoid harsh agitation and always check the label for specific guidance․

Water Temperature: Cold Water is Key

Maintaining cold water temperatures is absolutely crucial when machine washing Bernat Blanket yarn․ Hot water is a primary culprit in causing the polyester fibers to felt, shrink, or lose their incredibly soft texture․

The manufacturer consistently recommends a maximum water temperature of 86°F (30°C)․ Using cold water minimizes the risk of these undesirable changes, ensuring your finished projects remain plush and beautiful wash after wash․

Even lukewarm water can potentially cause issues, so err on the side of caution and select the coldest setting available on your washing machine; This simple step significantly extends the life and quality of your Bernat Blanket creations․

Remember to always prioritize cold water for optimal results!

Washing Cycle: Gentle or Delicate Setting

Selecting the appropriate washing cycle is paramount for preserving the integrity of Bernat Blanket yarn․ A gentle or delicate cycle is universally recommended to minimize agitation and friction during the wash process․

These cycles utilize slower spin speeds and a more cautious washing action, preventing excessive stretching, snagging, or damage to the yarn’s fibers․ Avoid using normal or heavy-duty cycles, as these can be far too harsh․

The goal is to clean the yarn effectively without subjecting it to undue stress․ A gentle cycle, combined with cold water, provides the ideal balance of cleaning power and fabric care, ensuring your projects remain soft and beautiful․

Prioritize a gentle approach for lasting quality!

Detergent Choice: Mild Detergent Recommended

When washing Bernat Blanket yarn, the choice of detergent is crucial․ Opting for a mild detergent is highly recommended to avoid damaging the delicate polyester fibers․ Harsh chemicals and strong enzymes found in many conventional detergents can cause fading, pilling, or even fiber breakdown․

Look for detergents specifically designed for delicate fabrics or baby clothes, as these are typically formulated to be gentler․ Avoid detergents containing bleach or fabric softeners, as these can alter the yarn’s texture and color․

Using a minimal amount of detergent is also advisable; excessive suds can be difficult to rinse out completely, leaving residue that attracts dirt and diminishes softness․

A gentle detergent ensures a clean, vibrant, and long-lasting finish!

Drying Bernat Blanket Yarn

Bernat Blanket yarn dries best using low heat in a tumble dryer, or alternatively, by air drying flat to maintain its shape and softness․

Avoid high heat, as it can cause shrinkage or damage the fibers!

Tumble Drying: Low Heat Only

Bernat Blanket yarn is generally safe to tumble dry, but adhering to the “low heat only” rule is absolutely crucial for preserving its plush texture and preventing damage․ Higher heat settings can cause the polyester fibers to melt or become misshapen, resulting in a flattened or distorted finished product․

When using a dryer, select the delicate or gentle cycle alongside the lowest heat option available․ Consider adding dryer balls to help fluff the yarn and reduce drying time․ It’s also wise to periodically check the yarn’s condition during the drying process to ensure it isn’t overheating․

Removing the item while it’s still slightly damp can further minimize the risk of heat damage and allow it to finish air drying, maintaining its optimal softness and form․ Remember, patience is key when drying Bernat Blanket yarn!

Air Drying as an Alternative

While Bernat Blanket yarn can be tumble dried on low, air drying presents a wonderfully gentle alternative, especially for larger projects or if you’re particularly cautious․ Laying the item flat on a clean, dry surface, like a drying rack or a large towel, is the most recommended method to prevent stretching or distortion․

Avoid direct sunlight, as prolonged exposure can potentially cause fading․ Ensure good air circulation in the room to expedite the drying process․ For blankets or larger pieces, periodically flip the item to ensure even drying on both sides․

Air drying may take longer than machine drying, but it’s a fantastic way to safeguard the yarn’s softness and maintain its original quality, offering peace of mind and a beautifully finished result․

Potential Issues and Troubleshooting

Bernat Blanket yarn can sometimes felt or pill with washing; cold water and gentle cycles help prevent this․ Color bleeding is rare, but caution is advised!

Felted Yarn: Causes and Prevention

Felted yarn occurs when the polyester fibers in Bernat Blanket Yarn become tangled and matted together during washing․ This is primarily caused by excessive heat and agitation․ Hot water opens the fibers, allowing them to interlock irreversibly, resulting in a denser, often smaller, finished product․

To prevent felting, always adhere to the recommended wash instructions: use cold water and a gentle cycle․ Avoid hot water at all costs! Excessive agitation, like a vigorous wash cycle, also contributes to felting, so a delicate setting is crucial․

While Bernat Blanket Yarn is generally resistant to felting compared to wool, improper washing can still lead to undesirable changes in texture and size․ Careful adherence to care guidelines will preserve the yarn’s original characteristics․

Pilling: Minimizing and Addressing

Pilling, the formation of small balls on the yarn’s surface, can occur with Bernat Blanket Yarn, even with careful washing․ It’s a natural consequence of fiber friction during use and cleaning․ While not a defect, pilling can affect the yarn’s appearance and softness․

Minimizing pilling involves gentle handling and adhering to wash instructions․ Using a mild detergent and avoiding harsh agitation during the wash cycle helps․ Tumble drying on low heat, or even air drying, reduces fiber stress․

To address existing pilling, a fabric shaver or sweater comb can carefully remove the pills, restoring the yarn’s smooth texture․ Regular, gentle care is the best preventative measure, maintaining the yarn’s quality and appearance over time․

Color Bleeding: Precautions to Take

While Bernat Blanket Yarn generally exhibits good colorfastness, precautions are wise, especially with deeply saturated or variegated colors․ To minimize the risk of color bleeding, always wash new items separately for the first wash or two․ This allows any excess dye to release without affecting other garments․

Using cold water during washing significantly reduces the likelihood of dye release․ Avoid hot water entirely, as it encourages bleeding․ A mild detergent, free of harsh chemicals, is also recommended․

If washing multiple colors together, consider using a color catcher sheet to absorb any stray dye molecules․ Thoroughly drying items flat or on a low heat setting further safeguards against color transfer․

Special Care Instructions

Bernat Blanket projects, like large blankets, benefit from washing in a large capacity machine․ Hand washing is an option for delicate items or when unsure․

Always prioritize gentle handling and follow label instructions for optimal results and longevity․

Washing Large Projects (Blankets, etc․)

Bernat Blanket yarn’s softness makes larger projects, such as blankets, incredibly cozy, but their size requires special washing considerations․ When laundering substantial items, utilizing a high-capacity washing machine is crucial to allow for adequate movement and thorough cleaning․

Avoid overcrowding the machine, as this can prevent proper rinsing and potentially lead to detergent residue․ Employ a gentle cycle with cold water, mirroring the recommendations for smaller items․ It’s also wise to consider a second rinse cycle to ensure all soap is removed․

Remember to check the yarn label for specific care instructions, as these supersede general guidelines․ Prioritizing gentle handling and a spacious washing environment will help maintain the blanket’s texture and prevent damage․

Hand Washing Bernat Blanket Yarn (When to Consider)

While Bernat Blanket yarn is generally machine washable, hand washing presents a viable alternative in specific scenarios․ Delicate items, or projects with intricate details, benefit from the gentler approach of hand washing, minimizing the risk of distortion or damage․

If you’re concerned about potential issues like pilling or color bleeding, hand washing offers greater control․ Use cold water and a mild detergent, gently agitating the yarn․ Avoid harsh scrubbing or twisting, as this can disrupt the fibers․

Rinse thoroughly until the water runs clear, and lay flat to dry․ Though more time-consuming, hand washing provides a cautious method for preserving your cherished creations․

Additional Resources

Bernat’s official website provides detailed care instructions, while community forums offer shared experiences and helpful tips from fellow crafters․

These resources can clarify any doubts and ensure your Bernat Blanket yarn projects remain beautiful for years to come!

Bernat Official Website Care Instructions

Bernat’s official website consistently recommends machine washing Bernat Blanket Yarn in cold water, utilizing a delicate cycle to minimize stress on the fibers․

They explicitly advise against bleaching or dry cleaning, as these processes can damage the yarn’s texture and color․

For drying, the website stresses the importance of tumble drying on a low heat setting, also using a delicate cycle․

Furthermore, Bernat highlights that their yarn is OEKO-TEX certified, ensuring it’s free from harmful substances, and reinforces gentle handling for optimal results․

Following these guidelines will help maintain the yarn’s softness and prevent issues like felting or pilling, extending the life of your cherished projects․

Community Forums and Shared Experiences

Bernat Blanket Yarn washing experiences widely shared in online forums confirm the manufacturer’s recommendations, but also reveal nuanced insights․

Many knitters and crocheters emphasize testing a small swatch first, even with machine-washable claims, to observe potential reactions․

Some users report successful washes with cold water and gentle cycles, while others cautiously suggest air drying to be extra safe․

Discussions highlight that while the yarn can withstand machine washing, it’s not entirely trouble-free; occasional pilling or slight texture changes are noted․

Experienced crafters consistently advise prioritizing low heat and gentle handling, sharing tips for reviving softness after washing, and preventing unwanted felting․

ge security system manual

GE Security System Manual: A Comprehensive Guide

This comprehensive guide details operation, arming, disarming, and programming of your GE security system. It aids understanding of features and potential interference issues.

Welcome to enhanced security and peace of mind! This manual serves as your primary resource for understanding and effectively utilizing your GE security system. It outlines fundamental commands for arming and disarming, alongside detailed programming instructions for customizing system features to your specific needs.

Your authorized dealer or installer likely discussed key aspects of your system during setup. However, this manual provides a comprehensive reference point for all functionalities. Be aware that external devices – Wi-Fi routers, cordless phones, microwaves, and Bluetooth speakers – can potentially cause interference. Proper placement and troubleshooting are addressed within. This guide will empower you to maximize your system’s protective capabilities.

System Components Overview

Your GE security system is comprised of several key interconnected components working in harmony to provide robust protection. These include the central control panel, the user interface via a keypad, and a network of wireless or wired sensors strategically placed throughout your property.

Sensors commonly encompass door and window contacts, as well as motion detectors, designed to identify unauthorized entry. The system also features a communication module for connecting to monitoring services, if subscribed. Understanding the interplay between these components is crucial for effective operation. Interference from nearby electronics, like C by GE bulbs, can impact performance, necessitating careful placement and potential adjustments.

Understanding the Control Panel

The control panel serves as the central hub of your GE security system, processing signals from sensors and coordinating system responses. It houses the system’s brain, battery backup, and communication module. Familiarize yourself with its indicator lights, which display system status – armed, disarmed, alarm, or trouble conditions.

The panel also manages user codes and system logs. Accessing and interpreting these logs can aid in troubleshooting. Remember that the panel’s internal processes, while sometimes appearing complex, are designed to ensure fairness and reliability. Proper functioning relies on avoiding interference from nearby devices, such as Wi-Fi routers or microwave ovens.

Keypad Functions and Operation

Your GE security system’s keypad is the primary interface for controlling and interacting with the system. It allows you to arm, disarm, and program various settings using a personalized user code. Key functions include entering your code, activating panic buttons (if equipped), and navigating the system menu.

Pay attention to the keypad’s display, which provides real-time system status updates. Understanding the different icons and messages is crucial for effective operation. Remember to keep your user code confidential to prevent unauthorized access. Consistent and correct keypad operation ensures the system’s reliability and your peace of mind.

Arming and Disarming the System

Properly arming and disarming your GE security system is fundamental to its effectiveness. Typically, this involves entering your user code on the keypad followed by a designated arming button (Away or Stay). The system will then initiate a countdown, allowing you to exit the premises or remain inside, respectively.

Disarming requires entering your code within the allotted timeframe after the alarm is triggered or upon returning home. Familiarize yourself with the specific arming modes and their implications. Always ensure all doors and windows are secured before arming to prevent false alarms. Consistent practice will ensure swift and reliable operation.

Stay Arming Mode

Stay Arming Mode is designed for when you are inside your home, offering perimeter protection while allowing movement within the premises. Upon activation, typically via a dedicated keypad button and user code entry, the system arms all door and window sensors. However, motion detectors are usually bypassed in this mode to prevent false alarms caused by indoor activity.

This mode is ideal for nighttime or when a single occupant remains at home. Remember to confirm all exterior access points are secure before arming. The system will alert you if a door or window is opened while armed in Stay mode, providing immediate notification of a potential breach.

Away Arming Mode

Away Arming Mode provides maximum security when your home is unoccupied. Activating this mode, usually through the keypad with a user code, arms all sensors – including door, window, and motion detectors – creating a complete protective shield. This setting assumes no one should be inside during activation, triggering an alarm upon any detected intrusion.

Before arming in Away mode, ensure all doors and windows are securely closed and that no pets or individuals remain within the premises. A designated entry/exit delay allows time to leave or enter without triggering a false alarm. This mode is crucial for safeguarding your property during vacations or extended absences.

Sensor Types and Placement

Your GE security system utilizes various sensor types for comprehensive protection. Door and window sensors, typically magnetic contacts, detect unauthorized entry when a door or window is opened. Motion detectors, employing infrared technology, identify movement within a designated area; Proper placement is crucial for optimal performance.

Door and window sensors should be installed on all exterior access points. Motion detectors are best positioned to cover high-traffic areas and potential entry routes, avoiding direct sunlight or heat sources which can cause false alarms. Consider pet immunity features when placing motion detectors to prevent unwanted activations.

Door and Window Sensors

Door and window sensors are fundamental to your GE security system, providing perimeter protection. These typically consist of two components: a sensor and a magnet. When a door or window is closed, the magnet is in close proximity to the sensor, completing a circuit. Opening the door or window separates the magnet, breaking the circuit and triggering an alarm signal.

Ensure sensors are securely mounted on both the frame and the moving part of the door or window. Proper alignment is critical for reliable operation. Regularly test sensors to confirm functionality and battery life. Consider using recessed sensors for a more discreet installation.

Motion Detectors

Motion detectors enhance your GE security system by detecting movement within a designated area. These sensors utilize various technologies, such as passive infrared (PIR), to identify changes in heat signatures. When motion is detected, a signal is sent to the control panel, potentially triggering an alarm.

Strategic placement is crucial; avoid directing them towards heat sources like vents or windows. Adjust sensitivity settings to minimize false alarms caused by pets or environmental factors. Regularly test motion detectors to ensure proper functionality and battery life. Consider the coverage area and adjust placement accordingly for optimal protection.

Programming System Features

The GE security system offers customizable features to tailor protection to your needs. Programming involves accessing the control panel’s settings, often requiring a master user code. Key features include adjusting entry/exit delays, configuring alarm verification settings, and managing user access codes.

Zone programming allows you to define how each sensor reacts to a triggered event – instant alarm, delayed alarm, or no response. Careful programming minimizes false alarms and ensures appropriate responses. Refer to the detailed programming section of this manual for step-by-step instructions and advanced options.

User Code Management

Effective user code management is crucial for system security. The master code grants full system control, while individual user codes provide access for arming and disarming. It’s vital to create unique codes for each user and avoid easily guessable combinations like birthdays or addresses.

This manual details how to add, delete, and modify user codes through the control panel interface. Regularly review and update user codes, especially after personnel changes. Consider setting different access levels – some users may only need stay-arming capabilities, while others require full system access. Securely store the master code and limit its distribution.

Zone Programming

Zone programming defines how each sensor interacts with the system. Each sensor is assigned to a specific zone, allowing for precise identification of alarm triggers. This manual explains how to configure zone types – instant, delay, or no-entry – based on the sensor’s location and function.

Proper zone programming is essential for minimizing false alarms and ensuring a swift response. You can customize zone names for easy identification (e.g., “Front Door,” “Living Room Window”). Understanding zone programming allows you to bypass specific sensors when necessary and tailor the system to your specific needs. Consult the advanced settings section for detailed configuration options.

Bypassing Sensors

Bypassing sensors temporarily disables their ability to trigger an alarm. This feature is useful when a sensor is malfunctioning, or a window is left open. Access the bypass function through the control panel or the GE Security System App. Each sensor can be individually bypassed, allowing you to maintain security for the rest of your property.

Remember that bypassing a sensor reduces the overall security coverage. The system will indicate which sensors are bypassed. Always re-enable sensors as soon as possible after the issue is resolved. Detailed instructions on bypassing sensors are available within the programming section of this manual;

System Troubleshooting

This section assists in resolving common issues with your GE Security System. Frequent problems include communication errors, false alarms, and low battery warnings. Begin by checking the system logs for specific error codes, which pinpoint the source of the problem. Low battery issues often require immediate attention; replace batteries promptly to maintain system functionality.

If the system experiences interference from nearby devices like Wi-Fi routers or Bluetooth speakers, reposition them. For persistent issues, consult the “Common Error Codes” list or contact GE Security Support for expert assistance. Regular maintenance and firmware updates can prevent many problems.

Common Error Codes

Understanding error codes is crucial for efficient troubleshooting of your GE Security System. Specific codes indicate the nature of the problem, guiding you towards a solution. While a complete list is extensive, common codes relate to sensor faults, communication failures, or power issues. A “sensor tamper” code suggests a sensor has been compromised or removed.

“Low battery” codes require immediate battery replacement. Communication errors might indicate wireless signal interference; reposition devices or check antenna connections. Refer to the system logs for detailed code descriptions and recommended actions. If an unfamiliar code appears, consult the manual or contact GE Security Support for assistance.

Low Battery Issues

Low battery warnings are critical indicators requiring prompt attention within your GE Security System. These alerts signify reduced sensor or control panel power, potentially compromising system reliability. The system typically displays a “low battery” error code and may emit audible chirps. Immediately identify the affected device – sensors, keypads, or the main control panel.

Replace batteries with the correct type and voltage as specified in the system documentation. After replacement, test the device to confirm proper functionality. Ignoring low battery warnings can lead to false alarms or system failure. Regularly scheduled battery checks are recommended for preventative maintenance.

Connecting to Monitoring Services

Professional monitoring significantly enhances your GE Security System’s effectiveness. Connecting to a monitoring service transmits alarm signals to a central station, ensuring rapid response during emergencies, even when you’re unavailable. This typically involves a monthly fee and a contract with a security provider.

The connection process usually requires providing your system’s account information and potentially a phone line or internet connection. Ensure compatibility between your system and the chosen monitoring service. Proper setup includes verifying signal transmission and testing the communication link. Consider the service’s response time and features when selecting a provider.

Wireless Communication and Range

GE Security Systems utilize wireless communication for sensor connectivity, offering flexibility in placement. However, wireless range is a critical factor for reliable operation. Signal strength can be affected by walls, floors, and interference from other devices like Wi-Fi routers and Bluetooth speakers.

Optimal range varies depending on the specific sensor and environmental conditions, but generally falls within 200-500 feet in open air. Regularly test sensor communication to ensure consistent connectivity. Consider using a range extender if sensors are located far from the control panel. Minimize interference by relocating potential sources or adjusting wireless channels.

GE Security System App Integration

Many GE Security Systems offer integration with a dedicated mobile application, enhancing control and convenience. This app allows users to remotely arm and disarm the system, receive real-time alerts for alarms or sensor activity, and view system status. The app often provides access to system logs and allows for user code management.

Ensure the app is compatible with your specific system model and operating system (iOS or Android). Download the app from a trusted source and follow the on-screen instructions for pairing with your control panel. Regularly check for app updates to benefit from new features and security enhancements. Troubleshoot connectivity issues by verifying your internet connection.

Firmware Updates and Maintenance

Maintaining your GE Security System involves periodic firmware updates, crucial for optimal performance and security. These updates address potential vulnerabilities, improve system stability, and introduce new features. Check the GE website or through the mobile app for available updates. Follow the provided instructions carefully during the update process, avoiding interruption.

Regularly inspect system components, including sensors and the control panel, for any signs of damage or wear. Clean the control panel with a soft, dry cloth. Avoid using harsh chemicals or liquids. Ensure proper battery levels in all wireless devices. Proactive maintenance extends system lifespan and reliability.

Battery Replacement Procedures

Maintaining optimal battery power is vital for your GE Security System’s reliability. Low battery warnings indicate the need for immediate replacement. Use only GE-approved batteries to ensure compatibility and prevent system malfunctions. Begin by powering down the system before accessing the battery compartment, typically located within each sensor or the control panel.

Carefully remove the old battery and insert the new one, observing the correct polarity (+ and -). Securely close the battery compartment. Test the sensor or device after replacement to confirm proper functionality. Dispose of old batteries responsibly, following local regulations. Regularly scheduled battery checks prevent unexpected system downtime.

Understanding System Logs

Your GE Security System diligently records a detailed history of events within its system logs. Accessing these logs, usually through the control panel or the GE Security System App, provides valuable insights into system activity. Logs document arming/disarming times, sensor triggers, alarm events, and any communication issues.

Reviewing these records aids in identifying potential problems, verifying alarm occurrences, and understanding system behavior. Familiarize yourself with the log’s format and common event codes. Regularly checking the logs can proactively detect anomalies or attempted breaches. These logs are crucial for troubleshooting and providing information to monitoring services or technical support.

Advanced Programming Options

The GE Security System offers advanced programming features for customized security. These options, accessible via the control panel, allow fine-tuning of system behavior. Entry/Exit Delay Adjustments let you modify the time allowed to arm/disarm, preventing false alarms. Alarm Verification Settings determine how the system responds to triggered sensors – immediate alarm or verification attempts.

Further customization includes adjusting sensor sensitivity, configuring zone types, and setting up specific user access levels. Careful consideration is needed when modifying these settings, as incorrect configurations can compromise system effectiveness. Refer to the full manual or contact GE support for assistance with advanced programming.

Entry/Exit Delay Adjustments

Adjusting entry and exit delays is crucial for preventing false alarms and ensuring system usability. The entry delay allows time to disarm the system upon entering a secured premises, preventing an immediate alarm trigger. Conversely, the exit delay provides time to leave the premises after arming the system.

These delays are programmable through the control panel, with options to customize the duration for each zone. Shorter delays offer quicker response, while longer delays accommodate slower routines. Consider household member habits when setting these times. Incorrect settings can lead to frequent false alarms or insufficient time to disarm, so careful adjustment is vital.

Alarm Verification Settings

Alarm verification settings enhance system reliability by reducing false alarm dispatches. This feature instructs the monitoring center to confirm an alarm event before contacting emergency services. Verification methods include dual technology detection – requiring two sensors to trigger – or call-back verification, where the center attempts to contact a designated individual.

Adjusting these settings through the control panel balances security with minimizing unnecessary responses. Higher verification levels decrease false alarms but may slightly delay emergency assistance. Consider your environment and risk tolerance when configuring these options. Proper setup ensures a swift and appropriate response to genuine threats, while avoiding costly false alarm fees.

Interference and Signal Strength

Wireless GE security systems can experience interference from other devices. Common culprits include Wi-Fi routers, cordless phones, microwave ovens, and Bluetooth speakers. These devices operate on similar frequencies, potentially disrupting communication between sensors and the control panel. To mitigate this, reposition your GE system components away from such sources.

Signal strength is crucial for reliable operation. Regularly check sensor signal levels via the control panel or app. Weak signals indicate potential interference or low battery. Consider relocating the control panel or adding a signal repeater to extend the wireless range. Maintaining strong signal strength ensures consistent and dependable security coverage throughout your property.

Factory Resetting the System

Performing a factory reset restores your GE security system to its original settings. This action erases all user codes, programmed settings, and sensor configurations. It should only be undertaken as a last resort, typically when troubleshooting significant system malfunctions or preparing the system for a new owner.

The reset procedure varies depending on the specific GE system model; consult your detailed manual for precise instructions. Generally, it involves accessing a hidden menu on the control panel and confirming the reset. Be aware that a factory reset will require complete system reprogramming, including re-pairing all sensors and re-establishing monitoring service connections.

Safety Precautions and Warnings

Prioritize safety when installing and maintaining your GE security system. Always disconnect power before working with wiring to prevent electrical shock. Avoid installing sensors in locations exposed to extreme temperatures or moisture, as this can compromise their functionality.

Regularly test the system to ensure all components are operating correctly. Never attempt to repair the control panel yourself; contact a qualified technician for any complex repairs. Be mindful of potential interference from other electronic devices, like Wi-Fi routers or cordless phones, which could affect wireless communication. Keep this manual readily available for future reference and troubleshooting.

Contacting GE Security Support

For assistance with your GE security system, several support avenues are available. While specific contact details may vary, begin by consulting the official GE Security website for updated information. Look for a dedicated support section offering FAQs, troubleshooting guides, and contact forms.

A direct phone line for technical support is often provided, allowing you to speak with a representative. Ensure you have your system model number and date of purchase readily available. Online chat support may also be accessible for quick assistance. If issues persist, consider contacting your original installer for specialized help. Remember to document all interactions with support for future reference.

Appendix: Glossary of Terms

This glossary defines key terms used throughout the GE security system manual. Zone: A specific area protected by sensors. Sensor: A device detecting intrusion (door/window, motion). Arming: Activating the system for security. Disarming: Deactivating the system. Entry Delay: Time to disarm upon entry. Exit Delay: Time to leave before the alarm triggers.

Bypass: Temporarily disabling a sensor. False Alarm: An unwarranted alarm activation. Monitoring Service: A company providing 24/7 alarm response. Wireless: Communication without physical wires. Firmware: Software controlling the system. Understanding these terms enhances your system’s operation and troubleshooting capabilities.

open g tuning chord chart pdf

Open G Tuning Chord Chart PDF: A Comprehensive Guide

Navigating the digital landscape for Open G tuning resources involves utilizing apps like Google Play and Google Drive for PDF access. Chrome and Gmail
facilitate account creation and file viewing, ensuring a seamless learning experience.

What is Open G Tuning?

Open G tuning is a guitar tuning where the strings are tuned to create a G major chord when strummed open, without any fingers pressed down. This is achieved by altering the standard tuning (EADGBE) to DGDGBD. The appeal lies in its resonant, ringing quality and its facilitation of slide guitar playing, a technique popularized by blues legends.

Essentially, it’s a re-voicing of the guitar, shifting the tonal center and opening up new harmonic possibilities. Accessing resources like a Open G tuning chord chart PDF becomes crucial for navigating these new voicings. These charts visually represent the finger positions for various chords within this tuning, simplifying the learning process.

The tuning’s inherent openness allows for easy chord transitions and the creation of rich, full sounds. It’s particularly favored in genres like blues, rock, and country, where its expressive capabilities shine. Utilizing digital tools, such as Google Drive to store and view your Open G tuning chord chart PDF, streamlines practice and exploration. Understanding the fundamentals of Open G tuning unlocks a world of musical expression, and a well-organized chart is your key.

Why Use Open G Tuning?

Open G tuning offers a unique sonic palette and playing experience, making it a favored choice for many guitarists. Its primary advantage lies in the ease with which one can play dominant chords and barre chords, simplifying complex progressions. This is particularly beneficial for slide guitar, allowing for smooth transitions and expressive vibrato.

The tuning’s resonant quality, stemming from the open G major chord, creates a full and rich sound, ideal for blues and rock styles. A Open G tuning chord chart PDF is invaluable for quickly grasping the new fingerings and chord shapes. It eliminates the need to mentally transpose chords from standard tuning, accelerating the learning curve.

Furthermore, Open G encourages experimentation and improvisation. The altered string tensions and harmonic relationships inspire new melodic ideas and rhythmic patterns. Accessing these charts via platforms like Google Drive, alongside apps like Chrome for research, enhances the learning process. Ultimately, Open G unlocks creative potential, offering a fresh perspective on familiar chords and progressions, and a Open G tuning chord chart PDF is your starting point.

The Standard Open G Tuning Notes

The foundation of exploring Open G tuning lies in understanding its specific string configuration. Unlike standard tuning (EADGBE), Open G alters the pitches to create a G major chord when strummed open. This is achieved by tuning the strings to DGDGBD – from the lowest (6th) to the highest (1st) string.

Specifically, the 6th string is tuned down from E to D, the 5th string remains at G, the 4th string remains at D, the 3rd string is tuned down from B to G, the 2nd string is tuned down from E to D, and the 1st string remains at B. A Open G tuning chord chart PDF visually represents these changes, making it easier to remember and implement.

Utilizing digital resources like Google Play for tuning apps and Chrome for accessing online charts streamlines the process. Remember, accurate tuning is crucial for achieving the desired resonant sound. Consistent reference to a Open G tuning chord chart PDF, alongside reliable tuning tools, ensures a harmonious and fulfilling playing experience. Mastering these notes unlocks the potential of this versatile tuning.

Common Chord Shapes in Open G

Transitioning to Open G tuning necessitates learning new chord shapes, as familiar fingerings from standard tuning won’t directly translate. A Open G tuning chord chart PDF is invaluable here, providing visual guides to these altered forms; Many common chords become surprisingly simple – the G major chord, for instance, often requires only a single finger to fret.

However, chords like C and D major demand adaptation. The chart will illustrate how to utilize the open strings to your advantage, creating fuller, more resonant sounds. Familiarizing yourself with these shapes builds muscle memory and allows for smoother chord changes. Accessing these charts via Google Drive or viewing them on a device using Chrome enhances learning.

Furthermore, understanding how barre chords function in Open G expands harmonic possibilities. A well-designed Open G tuning chord chart PDF will often include diagrams for these more advanced shapes. Consistent practice with the chart, coupled with reliable tuning apps found on Google Play, will quickly unlock a wealth of musical expression.

G Major Chord in Open G

The G Major chord in Open G tuning is arguably the easiest chord to grasp, often requiring minimal effort. A comprehensive Open G tuning chord chart PDF will typically demonstrate this simplicity – frequently, it’s played open, with no fingers needing to fret any strings. This is a core benefit of the tuning, providing an immediate, resonant G Major sound.

However, variations exist. Some charts may show a single finger on the 3rd fret of the low E string for a slightly fuller voicing. Understanding these subtle differences, readily available through PDF resources viewed via Google Drive or Chrome, is crucial. The open strings contribute significantly to the chord’s character, creating a naturally rich tone.

Mastering this chord is a foundational step. It allows for quick transitions to other common chords in Open G, as illustrated in detailed charts. Utilizing apps from Google Play to verify tuning ensures the G Major rings true. This simplicity unlocks a gateway to exploring blues and rock progressions, making the Open G tuning chord chart PDF an essential tool.

C Major Chord in Open G

The C Major chord in Open G tuning presents a slight increase in complexity compared to G Major, but remains accessible with a good Open G tuning chord chart PDF. Typically, this chord requires barring the 2nd fret with your index finger, encompassing the A and D strings. Some charts may illustrate alternative fingerings, offering variations for comfort and stylistic preference.

A quality PDF resource, easily viewed through Google Drive or Chrome, will clearly depict the finger placement. It’s important to ensure a clean barre, avoiding muted strings. The open G, B, and high E strings contribute to the chord’s overall resonance, creating a characteristic sound. Practicing smooth transitions between C Major and G Major is key to building proficiency.

Utilizing apps from Google Play to double-check your tuning before attempting the chord is highly recommended. A well-structured Open G tuning chord chart PDF will often include diagrams showing both the full chord shape and individual finger positions. Mastering this chord unlocks a wider range of harmonic possibilities within the Open G framework, essential for various musical styles.

D Major Chord in Open G

The D Major chord in Open G tuning is frequently depicted in Open G tuning chord chart PDFs as a relatively straightforward shape, though nuances exist depending on the specific voicing. Commonly, it involves fretting the 3rd fret of the B string with your index finger and the 2nd fret of the high E string with your middle finger. The remaining strings – G, D, A, and low E – remain open, contributing to the chord’s bright and resonant quality.

A comprehensive PDF, accessible via Google Drive or viewed in Chrome, should clearly illustrate this finger placement. Some charts may offer alternative fingerings, potentially utilizing a pinky on the 2nd fret of the high E string for added stability. Consistent practice, guided by a reliable chart, is crucial for developing clean transitions.

Before attempting the chord, verifying your tuning using an app from Google Play ensures accuracy. A well-designed Open G tuning chord chart PDF will often include multiple diagrams, showcasing different voicings and fingerings. Mastering the D Major chord expands your harmonic palette, enabling you to explore a wider range of musical possibilities within the Open G tuning system.

E Minor Chord in Open G

Open G tuning chord chart PDFs consistently present the E Minor chord as a foundational shape for blues and rock progressions. Typically, the chord is formed by barring the first fret with your index finger across the A and D strings. Simultaneously, the G, B, and high E strings remain open, creating the characteristic minor tonality. This voicing is often highlighted in downloadable charts found through Google Drive or accessible via Chrome.

A quality PDF will illustrate this clearly, potentially offering variations like adding the pinky to the second fret of the D string for a fuller sound. Utilizing apps from Google Play to confirm your Open G tuning before attempting the chord is essential for accurate results. Some charts may also demonstrate how to transition smoothly between E Minor and other common chords in Open G.

Consistent practice, guided by a detailed Open G tuning chord chart PDF, will build muscle memory and improve your chord changes. The E Minor chord’s melancholic quality makes it a versatile tool for expressive playing, and mastering it unlocks a wealth of musical possibilities within this tuning.

A Minor Chord in Open G

Open G tuning chord chart PDFs frequently depict the A Minor chord as a relatively straightforward shape, yet crucial for expanding harmonic possibilities. Commonly, the chord is formed by placing your index finger on the second fret of the D string, and your middle finger on the second fret of the G string. The remaining strings – E, B, and high E – remain open, contributing to the chord’s characteristic sound.

High-quality PDFs will often include diagrams showing finger placement, and potentially alternative voicings for varied textures. Accessing these charts through platforms like Google Drive, using Chrome for browsing, and verifying tuning with apps from Google Play ensures accuracy. Some charts demonstrate smooth transitions to and from A Minor, vital for song structures.

Consistent practice, guided by a comprehensive Open G tuning chord chart PDF, is key to mastering this chord. The A Minor’s emotive quality lends itself well to blues and folk styles, and proficiency unlocks a broader range of musical expression within the Open G tuning framework.

Open G Tuning and Blues Music

The synergy between Open G tuning and blues music is deeply rooted in the genre’s history, and readily accessible through Open G tuning chord chart PDFs. This tuning’s resonant, open quality naturally complements the expressive bends and slides characteristic of blues guitar playing. The major chord voicing, combined with the ability to easily add dominant 7ths, creates a classic blues tonality.

Many blues legends, seeking a fuller, more vibrant sound, adopted Open G. Charts often highlight common blues progressions in this tuning, simplifying complex chord changes. Utilizing resources like Google Drive to store and view these PDFs, and Chrome for online searches, streamlines the learning process.

Furthermore, the tuning facilitates bottleneck/slide guitar techniques, a cornerstone of blues. Open G tuning chord chart PDFs frequently illustrate slide positions and chord voicings optimized for this style. Accessing these resources via apps from Google Play ensures convenient practice and exploration of the blues idiom.

Popular Songs Utilizing Open G Tuning

Numerous iconic songs showcase the power and versatility of Open G tuning, with chord charts readily available as PDFs for learning and analysis. The Rolling Stones’ “Start Me Up” is a prime example, its driving rhythm and signature riff perfectly suited to the tuning’s open resonance. Similarly, “Brown Sugar” benefits from the tuning’s ability to create a raw, energetic sound.

Other notable tracks include “Honky Tonk Women” by the Rolling Stones and many songs by Ry Cooder, who extensively utilizes Open G for its slide guitar capabilities. Open G tuning chord chart PDFs often feature these songs, breaking down the chord progressions and techniques employed by the artists.

Accessing these charts through platforms like Google Drive and viewing them with apps like Chrome simplifies the learning process. Utilizing Google Play to find instructional materials further enhances understanding. These PDFs provide a practical pathway to replicating the sounds of these classic songs, demonstrating the tuning’s enduring appeal across genres.

Finding Open G Chord Chart PDFs Online

Locating Open G chord chart PDFs is readily achievable through various online avenues, leveraging tools like Google Play and Google Drive for access and organization. A simple web search using keywords like “Open G tuning chord chart PDF” yields numerous results, ranging from individual websites offering free charts to dedicated guitar resource platforms.

Many guitar tab and chord websites host extensive libraries of Open G tuning chord chart PDFs, categorized by skill level and song. Utilizing Google Drive allows for convenient storage and access to downloaded charts across multiple devices. Chrome serves as an excellent browser for navigating these resources and previewing PDF files.

Furthermore, online guitar communities and forums often share Open G tuning chord chart PDFs created by experienced players. These resources can be invaluable for learning new chord voicings and song arrangements. Remember to exercise caution when downloading files from unfamiliar sources, ensuring they are free from malware.

Evaluating the Quality of Open G Chord Charts

Assessing the quality of Open G chord chart PDFs is crucial for effective learning and accurate playing. Not all charts are created equal; some may contain errors or be poorly formatted, hindering progress. Begin by checking for clarity – are the chord diagrams easy to read and understand?

A high-quality Open G tuning chord chart PDF will clearly indicate finger placements, string numbers, and any necessary barre chords. Look for charts that offer multiple voicings for common chords, providing versatility in your playing. Consider the source; charts from reputable guitar websites or experienced instructors are generally more reliable.

Utilizing tools like Google Drive to store and compare different charts allows for a critical evaluation. Pay attention to whether the chart includes common chord progressions or song examples in Open G. Beware of charts with ambiguous diagrams or missing information. Cross-reference with other resources to verify accuracy, ensuring a solid foundation for your Open G journey.

Software and Apps for Open G Tuning

Leveraging software and apps streamlines the Open G tuning process and enhances learning. Accessing resources via platforms like Google Play is a convenient starting point for finding tuning applications. These apps often feature built-in tuners, chord libraries, and even interactive lessons tailored for Open G.

Consider apps that allow you to visually compare standard tuning to Open G, aiding in understanding the altered string tensions. Utilizing Google Drive to store downloaded Open G tuning chord chart PDFs ensures easy access across devices. Chrome, as a browser, facilitates research and exploration of online resources.

Some apps offer chord diagram displays, mirroring the information found in PDF charts, but with the added benefit of audio playback. Creating a Gmail account can provide access to exclusive guitar learning content and communities. Remember to prioritize apps with positive user reviews and reliable functionality, maximizing your learning experience.

Creating Your Own Open G Chord Chart

Personalizing your learning experience through a custom Open G chord chart is highly beneficial. Begin by utilizing readily available Open G tuning chord chart PDFs as templates, then adapt them to your specific needs. Google Drive serves as an excellent platform for storing and organizing your evolving chart.

Employing Chrome for research allows you to discover unique chord voicings and variations suited to Open G. Focus on diagrams that clearly illustrate finger placement for common chords like G, C, D, Em, and Am. Consider adding annotations for slide techniques and hammer-ons, common in Open G styles.

Leverage Gmail for collaborating with fellow guitarists, exchanging chord ideas and refining your chart; Regularly updating your chart with new discoveries ensures it remains a valuable resource. Remember to prioritize clarity and readability when designing your chart, making it easy to reference during practice and performance. A well-crafted chart enhances memorization and fluency.

Printing Open G Chord Charts

Once you’ve curated your ideal Open G chord chart, whether downloaded as a PDF or created independently, printing it offers a tangible practice aid. Utilizing Google Drive allows for easy access to your Open G tuning chord chart PDF from any device with internet connectivity, streamlining the printing process.

Employing Chrome as your browser ensures compatibility with most PDF viewers and print settings. Before printing, carefully review the chart’s layout to optimize paper usage. Consider printing multiple charts at reduced sizes for portability, or a larger, high-resolution version for clear visibility on a music stand.

Gmail can be used to share your finalized chart with others for printing, fostering collaborative learning. Ensure your printer is properly configured for optimal print quality. Laminating your printed chart provides durability, protecting it from wear and tear during frequent use. A physical chart offers a distraction-free learning experience, enhancing focus and retention.

Resources for Further Learning Open G Tuning

Beyond simply accessing an Open G tuning chord chart PDF, a wealth of online resources exists to deepen your understanding and skill. Utilizing platforms like Google Play, you can discover dedicated guitar tuning applications offering interactive chord diagrams and audio references for Open G.

Google Drive serves as a central hub for storing and organizing your Open G tuning chord chart PDF alongside supplementary learning materials. Chrome facilitates seamless browsing to guitar-focused websites and YouTube channels featuring Open G tutorials and song demonstrations.

Gmail can connect you with online guitar communities and instructors for personalized guidance. Consider exploring online forums and social media groups dedicated to Open G tuning to exchange tips and learn from fellow musicians. Remember to critically evaluate the quality of information encountered online, cross-referencing with multiple sources. Consistent practice, combined with diverse learning resources, will accelerate your mastery of this versatile tuning.

d&d 5e monster manual 2 pdf

D&D 5e Monster Manual 2 PDF: A Comprehensive Guide (Updated 12/05/2025)

Today, December 5th, 2025, players seek a dedicated 5e Monster Manual 2 PDF, mirroring the content of older editions like the 3.0/3.5 versions available on the
Internet Archive.
Resources such as Dungeon Masters Guild offer expanded options, including Monster Manual Expanded II, and projects like
Dragonix provide fan-created content.

What is the D&D 5e Monster Manual 2?

The concept of a D&D 5e Monster Manual 2 PDF stems from a desire for expanded bestiaries beyond the core 5th Edition Monster Manual. Historically, previous editions, like Dungeons & Dragons 3.0 and 3.5, featured dedicated “Monster Manual II” publications – readily available as PDFs through resources like the Internet Archive. These manuals significantly broadened the range of creatures available to Dungeon Masters.

Currently, a “true” official Monster Manual 2 for 5e doesn’t exist. However, the community has stepped in, creating unofficial expansions. Projects like Monster Manual Expanded II, found on the Dungeon Masters Guild, and fan-made compilations like Dragonix aim to fill this gap. These resources often present content in a PDF format, offering a similar experience to an official supplement, providing a wealth of new monsters and challenges for players.

Historical Context: From TSR to 5e

The lineage of monster compendiums stretches back to the early days of Dungeons & Dragons, originating with TSR. Early supplements expanded upon the initial monster roster, laying the groundwork for later, more comprehensive manuals. The tradition continued with Advanced Dungeons & Dragons, and solidified with the release of the first Monster Manual II for D&D 3.0, now accessible as a PDF via the Internet Archive.

This pattern of expanding bestiaries continued through 3.5e. With the advent of 5th Edition, Wizards of the Coast has taken a different approach, releasing monsters through various sourcebooks rather than a direct “Monster Manual 2”. However, the demand for a centralized, expanded resource persists, fueling the creation of community-driven projects like those found on the Dungeon Masters Guild, often distributed as PDFs, echoing the spirit of TSR’s original intent.

The Evolution of Monster Manuals

Initially, monster descriptions were scattered throughout TSR’s early D&D supplements. The first dedicated Monster Manual consolidated this information, becoming a cornerstone of the game. Later editions, including the 3.0 and 3.5e iterations – available now as PDFs through resources like the Internet Archive – expanded upon this foundation with Monster Manual II and beyond.

The evolution reflects a shift from simply listing monsters to providing more detailed lore and ecology. With 5e, Wizards of the Coast fragmented monster releases across numerous sourcebooks. This approach, while offering diverse content, has created a desire for a centralized “Monster Manual 2” – a need partially addressed by fan-made projects like Dragonix and offerings on the Dungeon Masters Guild, often available as downloadable PDFs.

D&D 3.0 and the Original Monster Manual II

Published in 2002, the D&D 3.0 Monster Manual II significantly expanded the bestiary, introducing creatures absent from the initial 3.0 Monster Manual. This supplement, readily available as a free download and archive on the Internet Archive, became a staple for Dungeon Masters seeking variety. It featured a diverse range of monsters, from classic foes to entirely new creations, enriching campaign worlds.

The 3.5 edition saw updates and revisions, but the core content remained influential. The desire for a similar expansion in 5e fuels the search for a “Monster Manual 2” PDF. While no official equivalent exists, projects like Dragonix and resources on the Dungeon Masters Guild attempt to replicate that expanded monster roster, often in PDF format.

Differences Between 3.5 and 5e Monster Manuals

The transition from D&D 3.5 to 5e brought significant changes to monster presentation and design. 3;5’s Monster Manual II often included extensive stat blocks with numerous feats and special abilities. 5e streamlines this, focusing on core mechanics and simplified abilities for faster gameplay. This impacts the adaptation of older monsters into 5e formats.

While the 3.5 Monster Manual II offered a vast catalog, 5e distributes new monsters across multiple sourcebooks like Volo’s Guide to Monsters and Mordenkainen Presents: Monsters of the Multiverse. The lack of a single “Monster Manual 2” PDF in 5e necessitates utilizing these scattered resources or fan-created content like Dragonix, found online, to achieve a similar breadth of creatures.

Availability of a “True” 5e Monster Manual 2

Currently, there isn’t an officially published “Monster Manual 2” PDF released by Wizards of the Coast for D&D 5e. Unlike the 3.0 and 3.5 editions, which had a dedicated second monster compendium, 5e expands its bestiary through various sourcebooks and supplemental materials. This leaves players seeking a similar comprehensive collection reliant on unofficial sources.

The Dungeon Masters Guild hosts community-created content, such as Monster Manual Expanded II, attempting to fill this gap. However, these are not official Wizards of the Coast products. Players often resort to compiling lists from online databases or utilizing older edition materials, adapting them for 5e play, as detailed in resources like those found on the Internet Archive.

Unofficial & Fan-Created Monster Manuals

Given the lack of an official D&D 5e Monster Manual 2, a thriving community has stepped in to create alternatives. Projects like Dragonix ౼ Monster Manual Expanded II v1.06, available on platforms like AnyFlip, offer extensive monster lists and stat blocks. The Dungeon Masters Guild is a central hub for these creations, including the popular Monster Manual Expanded II, providing a wealth of new creatures.

These resources often aim to replicate the scope of the 3.0/3.5 Monster Manual II, found on the Internet Archive, but tailored for 5e’s mechanics. While offering valuable content, it’s crucial to remember these are not officially sanctioned, requiring careful review and potential adaptation for balanced gameplay.

Monster Manual Expanded II (Dungeon Masters Guild)

Monster Manual Expanded II, available on the Dungeon Masters Guild, stands out as a significant fan-created resource addressing the demand for expanded monster options in D&D 5e. It builds upon the foundation of existing 5e materials, offering a substantial collection of new creatures and variations. The Guild listing highlights potential savings by purchasing the series bundle, suggesting a broader collection of expanded content is available.

This project aims to fill the gap left by the absence of an official Monster Manual 2, drawing inspiration from older editions like the 3.5 version found on the Internet Archive. It provides DMs with tools to diversify encounters and challenge players with unique monsters, though careful balancing remains essential.

Dragonix ⎯ Monster Manual Expanded II v1.06

Dragonix ౼ Monster Manual Expanded II v1.06, published on AnyFlip on August 27, 2020, represents another dedicated effort by the D&D community to expand the bestiary for D&D 5e. This fan-created resource offers a substantial collection of monsters, aiming to supplement the official sourcebooks and address the lack of a dedicated Monster Manual 2.

Available as a flipbook, Dragonix provides a visually accessible way to browse its contents. Like other community-driven projects, it draws inspiration from older editions, potentially adapting creatures from the 3.0/3.5 era found on resources like the Internet Archive. Dungeon Masters should carefully review and adapt these monsters for balanced encounters within their 5e campaigns.

Where to Find PDF Versions

Finding a legitimate PDF of a dedicated D&D 5e Monster Manual 2 proves challenging, as Wizards of the Coast hasn’t officially released one. However, several avenues offer potential access to expanded monster content in PDF format. The Internet Archive hosts scans of older editions, like the 3.0/3.5 Monster Manual II, which can be adapted for 5e.

The Dungeon Masters Guild (DMG) is a key resource, offering products like Monster Manual Expanded II as downloadable PDFs. Additionally, fan-created projects, such as Dragonix (available on platforms like AnyFlip), may have PDF versions accessible through their creators. Exercise caution when downloading from third-party websites, prioritizing legality and security.

Internet Archive Resources

The Internet Archive serves as a valuable repository for older D&D materials, offering scanned PDFs of publications like the TSR 02016 Monster Manual II and the 3.5 edition’s Monster Manual II. While not directly a 5e resource, these older manuals provide a wealth of creatures adaptable to the current edition.

Users can freely download, borrow, and stream these PDFs, offering a cost-effective way to expand monster options. The archive categorizes these under “role-playing-gamebooks” and “folkscanomy_games,” simplifying the search process. Remember that these are older editions requiring conversion to 5e stat blocks. The Internet Archive’s collection is continually growing, making it a worthwhile resource for DMs seeking inspiration.

Dungeon Masters Guild (DMG) Options

The Dungeon Masters Guild (DMG) presents a significant avenue for acquiring 5e-compatible monster content. Specifically, Monster Manual Expanded II (5E) offers a substantial collection of new creatures and variations, designed to supplement the official 5e monster repertoire. Purchasing through the DMG directly supports creators and ensures a legally obtained product.

The DMG often features bundles offering cost savings, such as combining Monster Manual Expanded with its sequel. These resources are typically available as PDFs, providing immediate access for game preparation. While not a direct replacement for an official “Monster Manual 2,” the DMG provides a robust alternative, filled with community-created and vetted content.

Third-Party Websites & Potential Risks

Seeking a D&D 5e Monster Manual 2 PDF on third-party websites carries inherent risks. While numerous sites may offer downloads, many operate outside legal boundaries, potentially violating copyright laws. Downloading from unverified sources exposes users to malware, viruses, and other harmful software disguised as game content. These malicious programs can compromise personal data and system security.

Furthermore, PDFs obtained illegally often lack quality control, containing errors, incomplete information, or improperly formatted stat blocks. Prioritize legitimate sources like the Dungeon Masters Guild or official Wizards of the Coast channels to ensure a safe and reliable experience. Always exercise caution and employ robust antivirus software when browsing for downloadable game materials.

Legality and Copyright Considerations

Downloading and distributing a D&D 5e Monster Manual 2 PDF without authorization raises significant legal and copyright concerns. Wizards of the Coast retains exclusive rights to its intellectual property, including monster stat blocks and descriptions. Obtaining a PDF from unofficial sources often constitutes copyright infringement, potentially leading to legal repercussions for both the downloader and distributor.

Understanding Fair Use is crucial; simply possessing a copy for personal use may fall into a gray area, but widespread sharing or commercial exploitation is unequivocally illegal. Supporting official releases, like those on the Dungeon Masters Guild, ensures creators are compensated and encourages further development of quality content. Respecting copyright protects the future of the game.

Understanding Fair Use

The concept of Fair Use allows limited use of copyrighted material without permission, but its application to a D&D 5e Monster Manual 2 PDF is complex. Factors considered include the purpose and character of the use, the nature of the copyrighted work, the amount used, and the effect on the market.

Personal, non-commercial use – like referencing a monster’s ability for a home game – might qualify, but distributing a full PDF, even amongst friends, generally does not. Transformative uses, such as creating a critical analysis, are more likely to be considered fair use. However, simply replicating the content for convenience is a violation. Always prioritize legally obtained resources like official publications and Dungeon Masters Guild content.

Risks of Downloading from Unverified Sources

Seeking a D&D 5e Monster Manual 2 PDF from untrustworthy websites carries significant risks. These sources often bundle malware – viruses, spyware, and ransomware – with the desired file, compromising your device and data. Downloading copyrighted material illegally also exposes you to legal repercussions, though enforcement varies.

Websites offering “free” PDFs frequently lack security protocols, making them breeding grounds for malicious software. Even seemingly legitimate sites can be compromised. Protect yourself by utilizing reputable platforms like the Internet Archive (with caution) and the Dungeon Masters Guild. Always scan downloaded files with updated antivirus software before opening them, and consider using a virtual machine for added security.

Protecting Yourself from Malware

When searching for a D&D 5e Monster Manual 2 PDF, proactive malware protection is crucial. Install and maintain a reputable antivirus and anti-malware program, ensuring it’s updated with the latest definitions. Enable real-time scanning to detect threats as they download. Utilize a firewall to control network access and block suspicious connections.

Exercise extreme caution when clicking links or downloading files from unfamiliar websites. Scan all downloaded PDFs with your antivirus software before opening them. Consider using a virtual machine – a separate, isolated operating system – to safely examine potentially risky files. Regularly back up your important data to an external drive or cloud service, safeguarding against ransomware attacks. Prioritize official sources like the Dungeon Masters Guild whenever possible.

Key Monsters Included (Based on 3.0/3.5 MMII)

While a direct 5e equivalent is absent, content from the 3.0/3.5 Monster Manual II frequently inspires player requests. Expect demand for creatures like advanced Beholders and their varied forms – Gauths, Spectators, and Death Tyrants. Dragons beyond the standard chromatic and metallic types, including Gem Dragons and their unique abilities, are highly sought after.

The 3.5 edition’s expanded bestiary also featured a wealth of Undead and Fiendish entities. Players often desire encounters with powerful Liches, unique Devils, and challenging Demons. Resources like the Internet Archive showcase the breadth of these monsters. Fan-created content, such as Dragonix, often attempts to fill this gap, adapting these creatures for 5e play.

Notable Creatures: A Comparison

Comparing the 3.0/3.5 Monster Manual II to available 5e content reveals gaps. For example, the 3;5 edition detailed numerous Beholder variants – Gauths, Spectators, and Death Tyrants – with unique abilities not fully represented in 5e. Similarly, the 3.5 manual offered a wider range of Dragon types, like Gem Dragons, with distinct breath weapons and traits.

The 3.5 version also excelled in presenting complex Undead and Fiendish creatures. While 5e has strong options, the sheer volume and detail in Monster Manual II were substantial. Resources like the Dungeon Masters Guild and projects like Dragonix attempt to bridge this divide, adapting these monsters for 5e, often requiring significant rebalancing.

Beholders and their Variants

The original Monster Manual II (3.0/3.5) provided an extensive catalog of Beholders and their unsettling kin, a depth currently lacking in official 5e publications. Beyond the standard Beholder, the 3.5 edition detailed variants like the Gauth, a smaller, more cunning scout, and the terrifying Spectator, often bound to service. The Death Tyrant, a Beholder lich, presented a formidable undead challenge.

These variants offered unique tactical considerations for Dungeon Masters. 5e’s official resources offer limited options, pushing DMs towards third-party content like the Dungeon Masters Guild’s Monster Manual Expanded II or fan-made projects like Dragonix to replicate this variety. Adapting these creatures requires careful stat block conversion and balancing to maintain 5e’s encounter design principles.

Dragons and Draconic Creatures

The 3.0/3.5 Monster Manual II significantly expanded beyond the standard chromatic and metallic dragons, introducing a wealth of draconic creatures absent from core 5e materials. This included detailed entries for Dragon Turtles, powerful ancient beings, and various Drakes – smaller, less intelligent relatives of true dragons. More exotic entries like the Amphiptere, a wingless dragon, and the Wyvern, with its poisonous stinger, added depth to draconic encounters.

Currently, DMs seeking this level of draconic diversity often rely on unofficial PDFs or resources like the Dungeon Masters Guild’s expanded monster lists. Converting these creatures to 5e requires careful attention to action economy and damage output, ensuring balanced and engaging encounters for players. Finding these resources often involves searching the Internet Archive.

Undead and Fiendish Entities

The original Monster Manual II (3.0/3.5) offered a substantial increase in undead and fiendish variety compared to the core rulebooks. This included more nuanced demon and devil hierarchies, alongside unique undead like the Dhampir – a half-vampire creature – and variations on classic undead such as Mummies with specialized abilities. The manual also detailed lesser-known fiends and undead, providing DMs with tools for crafting complex infernal or necromantic campaigns.

For 5e players seeking similar depth, a dedicated Monster Manual 2 PDF remains elusive. DMs often turn to fan-created content, like the Dragonix project, or explore resources on the Dungeon Masters Guild. Adapting these creatures requires careful consideration of 5e’s challenge rating system and ensuring balanced encounters, often found via Internet Archive searches.

Using Monster Manual Content in 5e Games

Integrating content from older Monster Manual II editions (3.0/3.5) into 5e requires adaptation, as the systems differ significantly. Direct stat block translation is rarely effective; instead, DMs must focus on the creature’s role and abilities, then rebuild it using 5e’s mechanics. This involves assigning appropriate Challenge Ratings (CR) and selecting comparable monster types as a baseline.

Resources like the Dungeon Masters Guild offer guidance and pre-converted monsters; However, careful balancing is crucial. The Internet Archive provides access to the original materials for inspiration. Remember to prioritize fun and narrative impact over strict mechanical accuracy, ensuring encounters remain engaging for 5e players.

Adapting 3.0/3.5 Monsters to 5e

Successfully adapting monsters from the 3.0/3.5 Monster Manual II to 5e demands a systematic approach. Begin by identifying the core concept and abilities of the creature. Then, translate those into 5e terms, focusing on action economy and damage output. Avoid direct stat-block conversions; instead, use existing 5e monsters with similar roles as templates.

Consider the creature’s Challenge Rating (CR). Resources like the Dungeon Masters Guild and materials found on the Internet Archive can offer comparative data. Adjust hit points, armor class, and attack bonuses to align with 5e’s scaling. Prioritize creating a balanced and engaging encounter, rather than a mechanically perfect replica.

Stat Block Conversion Guidelines

Converting stats from 3.0/3.5 to 5e requires careful consideration. Hit Dice generally translate to hit points, but 5e uses simpler scaling. Feats should become abilities or traits. Skills are streamlined; focus on proficiencies relevant to the monster’s role. Base Attack Bonus informs attack and damage bonuses, but 5e emphasizes advantage/disadvantage.

Special abilities need re-evaluation. Monster Manual II often featured complex effects. Simplify these into 5e’s action-based system. Spells should be replaced with equivalent 5e spells or unique abilities. Remember, balance is key. Utilize resources like the Dungeon Masters Guild for inspiration and ensure the converted monster fits within 5e’s CR guidelines.

Balancing Challenges for 5e Players

Adapting monsters from older editions, like those found in a potential D&D 5e Monster Manual 2 PDF based on the 3.0/3.5 Monster Manual II, demands careful balancing. 5e emphasizes tactical combat and resource management. Ensure monsters present meaningful challenges without overwhelming players.

Consider action economy; avoid abilities that allow monsters to act excessively. Adjust hit points and damage output to align with 5e’s CR system. Leverage conditions like frightened or restrained to create dynamic encounters. Remember that player character abilities, especially at higher levels, are potent. Resources like the Dungeon Masters Guild can offer insights into community-created balanced encounters.

Alternatives to a Dedicated Monster Manual 2

Given the lack of an official D&D 5e Monster Manual 2 PDF, Dungeon Masters have several viable alternatives. Existing 5e sourcebooks, such as Volo’s Guide to Monsters, Mordenkainen Presents: Monsters of the Multiverse, and Fizban’s Treasury of Dragons, significantly expand the bestiary.

Furthermore, online monster databases and resources, like those found through community forums, offer a wealth of creatures. Utilizing fan-created content, such as Dragonix ⎯ Monster Manual Expanded II (available on platforms like AnyFlip), can also supplement encounters. Remember to carefully vet any third-party material for balance and adherence to 5e rules before incorporating it into your game.

Utilizing Existing 5e Sourcebooks

Rather than solely relying on a non-existent official D&D 5e Monster Manual 2 PDF, DMs can effectively leverage existing official 5e sourcebooks. Volo’s Guide to Monsters provides a substantial collection of creatures, expanding beyond the core Monster Manual. Mordenkainen Presents: Monsters of the Multiverse offers a revised and updated bestiary, consolidating monsters from various sources.

Fizban’s Treasury of Dragons focuses specifically on draconic creatures, offering unique variants and lore. These books, readily available in both physical and digital formats, provide a diverse range of monsters suitable for various campaign levels, effectively mitigating the need for a dedicated second monster manual.

Online Monster Databases and Resources

For DMs seeking to supplement their monster options beyond official sourcebooks, numerous online databases and resources prove invaluable, lessening the demand for a dedicated D&D 5e Monster Manual 2 PDF. Websites like D&D Beyond offer searchable monster stat blocks and filtering options.

Donjon provides random monster generators and encounter builders, aiding in quick campaign preparation. The r/DnD subreddit and associated wikis often feature player-created monsters and adaptations. However, caution is advised when utilizing fan-created content; always verify balance and accuracy before incorporating it into your game, ensuring a consistent and enjoyable experience for players.

Creating Your Own Monsters

The absence of a definitive D&D 5e Monster Manual 2 PDF encourages Dungeon Masters to embrace creativity and design unique monsters tailored to their campaigns. This process allows for unparalleled customization and the introduction of truly memorable encounters. Start by considering the monster’s role within your narrative – is it a challenging boss, a cunning minion, or a mysterious entity?

Drawing inspiration from existing 5e monsters, adapt stat blocks and abilities to fit your vision. Focus on creating a compelling backstory and defining the monster’s motivations. Remember to balance challenge ratings appropriately, ensuring encounters remain engaging without overwhelming players. Online resources offer guidance on D&D Beyond stat block creation.

coloring printable mothers day cards to color pdf

Celebrate Mother’s Day with heartfelt‚ personalized cards! Coloring printable cards offer a creative and affordable way to show appreciation. Download and color unique designs today!

Why Choose Coloring Cards?

Coloring cards provide a unique and personal touch that store-bought cards often lack. They allow for individual expression and creativity‚ making each card truly one-of-a-kind. These printable options are incredibly convenient‚ easily accessible from various online resources like Sarah Renae Clark and Cassie Smallwood.

Furthermore‚ coloring is a relaxing and enjoyable activity for both children and adults. It’s a wonderful way to spend quality time together as a family‚ creating a meaningful gift from the heart. The act of creating adds an extra layer of sentiment!

The Benefits of a DIY Mother’s Day Card

Creating a DIY Mother’s Day card offers significant emotional benefits. It demonstrates thoughtfulness and effort‚ showing Mom how much you care. Coloring printable cards allows for personalization – choose her favorite colors and designs! This hands-on approach fosters creativity and provides a rewarding experience.

Beyond the sentimental value‚ DIY cards are budget-friendly. Free printables from artists like Cassie Smallwood and Sarah Renae Clark make it accessible to everyone. It’s a special gift that doesn’t require a large financial investment‚ just time and love!

Finding the Right Printable Cards

Discover a wide selection of printable cards online! Websites offer free downloads‚ including options from Cassie Smallwood and Sarah Renae Clark.

Where to Download Free Printable Cards

Numerous online resources provide free printable Mother’s Day coloring cards. Sarah Renae Clark’s website features a delightful pack of three versions – two pre-colored and one ready for your artistic touch. Cassie Smallwood also offers unique printable cards‚ including special designs for Grandma and Nana.

Many websites host collections of these cards‚ allowing you to easily download and print them at home. Look for options that suit your style and the recipient’s preferences. These resources make creating a personalized Mother’s Day gift simple and enjoyable!

Popular Websites Offering Coloring Cards

Several websites are dedicated to providing free printable coloring cards for Mother’s Day. Daydream Into Reality boasts over 35 free PDF coloring card options‚ offering a wide variety of designs. Sarah Renae Clark’s site is a go-to for beautifully designed cards‚ including color-in and pre-colored versions.

Cassie Smallwood offers a unique selection‚ with cards specifically for grandmothers. These platforms provide convenient access to a diverse range of styles‚ ensuring you’ll find the perfect card to personalize and express your love!

Card Size and Paper Options

Most printable coloring cards are designed to fit standard letter size paper (8.5 x 11 inches)‚ but A4 compatibility is often available through scaling options during printing. Sarah Renae Clark’s cards‚ for example‚ can be adjusted for A4 printers.

Paper weight is crucial; heavier cardstock (65-110lb) is recommended for durability and a premium feel. Standard printer paper is suitable‚ but may require careful handling after coloring. Consider the coloring medium when choosing paper – heavier paper is best for markers!

Standard Letter Size (8.5 x 11) vs. A4

The primary difference lies in dimensions: 8.5 x 11 inches (Letter) versus 8.27 x 11.69 inches (A4). Many printable cards‚ like those from Sarah Renae Clark‚ are initially designed for Letter size‚ but scaling options allow adaptation to A4.

Scaling during printing is key to ensure proper fit and cut lines. While the difference is slight‚ it can affect the final card size and appearance. Always preview the print to confirm alignment before committing to a full print run.

Choosing the Right Paper Weight

For coloring printable Mother’s Day cards‚ paper weight significantly impacts the experience. Standard printer paper (20lb) works‚ but heavier cardstock (65-110lb) is ideal. Heavier paper prevents bleed-through from markers and allows for richer color from colored pencils.

Cardstock also provides a more premium feel and durability. Consider the coloring tools used; markers necessitate thicker paper. Experiment with different weights to find the perfect balance between print quality‚ coloring enjoyment‚ and card sturdiness.

Types of Coloring Card Designs

Discover diverse designs! Options include floral patterns‚ heart motifs‚ cards with sentiments‚ and special cards for Grandma/Nana‚ plus bookmark styles.

Floral Designs

Immerse yourselves in the beauty of floral coloring card designs! Numerous printable options showcase vibrant flowers and delicate botanical illustrations‚ perfect for adding a personal touch. These designs often feature sunshine‚ blooming bouquets‚ and intricate floral arrangements‚ offering a relaxing and creative outlet.

Whether you prefer simple daisies or complex roses‚ there’s a floral card to suit every style. Coloring these cards allows for experimentation with different color palettes‚ creating a truly unique and thoughtful Mother’s Day gift. Embrace the joy of nature through art!

Heart-Themed Cards

Express your love with charming heart-themed coloring cards! These designs symbolize affection and gratitude‚ making them a perfect choice for Mother’s Day. Printable options range from simple heart outlines to more intricate patterns incorporating flowers and sentiments.

Coloring heart designs allows for creative expression using a variety of colors and techniques. Add personal touches by incorporating favorite colors or patterns. These cards offer a sweet and meaningful way to show Mom how much she is cherished‚ creating a lasting keepsake.

Cards with Sentiments (“Happy Mother’s Day”)

Share a classic message of love with coloring cards featuring “Happy Mother’s Day” sentiments! These printable cards combine the joy of coloring with a traditional greeting‚ offering a personalized touch. Designs vary from elegant calligraphy to playful fonts‚ often integrated with floral or abstract artwork.

Coloring these cards allows for customization‚ making the message even more special. Choose colors that reflect Mom’s personality or create a vibrant and cheerful design. It’s a thoughtful way to express gratitude and affection on her special day‚ creating a treasured memento.

Cards Specifically for Grandma/Nana

Show extra love to Grandma or Nana with dedicated coloring cards! These printable cards recognize the unique bond with these special maternal figures. Designs often feature heartwarming imagery like flowers‚ hearts‚ or sweet messages specifically tailored for grandmothers.

Coloring provides a personal touch‚ allowing you to create a card that reflects her individual style. Cassie Smallwood offers printable coloring cards specifically for Grandma and Nana‚ making it easy to express your appreciation. It’s a wonderful way to celebrate her love and wisdom!

Bookmark Style Coloring Cards

Combine a heartfelt message with a practical gift! Bookmark-style coloring cards offer a unique and functional way to celebrate Mother’s Day. These printable cards allow for creative expression while providing a lovely keepsake she can use every day.

Imagine your mom or grandma enjoying her favorite book with a beautifully colored bookmark you created! The Cutest FREE Printable Mothers Day Coloring Pages features a fun and functional bookmark design. It’s a thoughtful gift that shows you care and adds a personal touch to her reading experience.

Card Features & Styles

Printable cards come in various styles‚ including cut-and-fold templates‚ pre-colored options‚ and designs suited for all ages and skill levels!

Cut and Fold Lines

Many printable Mother’s Day cards are thoughtfully designed with pre-printed cut and fold lines‚ making assembly incredibly easy. These guidelines ensure a neat and professional-looking finished card‚ even for those who aren’t crafting experts.

Sarah Renae Clark’s cards‚ for example‚ specifically include these lines‚ resulting in a card that folds to approximately 5 x 7 inches. This feature simplifies the process‚ allowing more time to focus on the creative coloring aspect and personalizing the message inside. It’s a convenient and user-friendly detail!

Pre-Colored Options Included

For those who enjoy a head start‚ or for younger children who might struggle with extensive coloring‚ some printable Mother’s Day cards offer pre-colored versions. These provide a beautiful base and reduce the time commitment‚ while still allowing for personalization.

Sarah Renae Clark’s free download includes two already colored card options‚ alongside a card ready for coloring. This caters to different preferences and skill levels‚ ensuring everyone can participate in creating a special gift. It’s a fantastic way to add a touch of color quickly!

Simple Designs for Younger Children

When selecting coloring cards for little ones‚ prioritize designs with larger spaces and fewer intricate details. Simple floral outlines‚ basic heart shapes‚ and bold lettering are ideal. These allow young children to easily stay within the lines and experience success‚ boosting their confidence.

Look for cards with clear‚ defined shapes and minimal background clutter. The focus should be on fun and creativity‚ not frustration. Many printable options cater to various age groups‚ ensuring there’s a perfect card for every child’s skill level.

More Intricate Designs for Older Children/Adults

For older children and adults‚ explore coloring cards featuring detailed floral arrangements‚ complex patterns‚ and sophisticated sentiments. These designs provide a more challenging and rewarding coloring experience. Intricate details allow for greater artistic expression and the opportunity to experiment with blending and shading techniques.

Look for cards with smaller spaces‚ delicate linework‚ and potentially mandalas or abstract designs. These options cater to those who enjoy a longer‚ more focused coloring session‚ resulting in a truly stunning and personalized Mother’s Day card.

Coloring Techniques & Materials

Utilize crayons‚ markers‚ or colored pencils to bring your card to life! Experiment with blending for depth and consider layering colors for a beautiful finish.

Best Coloring Tools (Crayons‚ Markers‚ Colored Pencils)

Choosing the right tools can significantly enhance your coloring experience. Crayons are fantastic for younger children‚ offering ease of use and vibrant colors‚ though blending can be challenging. Markers provide bold‚ saturated hues‚ perfect for making designs pop‚ but be mindful of potential bleed-through on thinner paper.

Colored pencils allow for detailed work and subtle shading‚ offering excellent control and blendability. For intricate floral designs‚ fine-tipped colored pencils are ideal. Experiment with different brands and types to discover your preference. Consider water-based markers for a watercolor effect!

Coloring Tips for a Beautiful Finish

To achieve a stunning finish‚ start with light layers‚ gradually building color intensity. This prevents harsh lines and allows for smoother blending. Experiment with color combinations – complementary colors create vibrancy‚ while analogous colors offer harmony.

Don’t be afraid to add shadows and highlights to create depth. For floral designs‚ consider the natural light source. Take your time and enjoy the process! A gentle touch and patience will result in a beautifully colored Mother’s Day card.

Blending Colors for Depth

Achieve a professional look by seamlessly blending colors. Use a light hand and apply colors in circular motions. For crayons‚ layering different shades creates a blended effect. With markers‚ quickly apply one color‚ then blend it with a lighter shade before it dries.

Colored pencils excel at blending; use a blending stump or tortillon to soften edges. Experiment with color gradients – transitioning from dark to light adds dimension. Blending brings your Mother’s Day card’s design to life!

Printing & Preparation

Ensure vibrant results by adjusting printer settings for quality. Scale prints to fit 8.5×11 or A4 paper. Prepare the card for coloring by carefully removing it!

Printer Settings for Optimal Quality

To achieve the best possible print quality for your coloring cards‚ several printer settings are crucial. First‚ select a high-resolution setting – at least 300 DPI is recommended for crisp lines and detailed designs. Next‚ choose the appropriate paper type in your printer settings; selecting ‘photo paper’ or a similar high-quality option often yields richer colors‚ even for black and white prints intended for coloring.

Ensure color management is set to ‘automatic’ or the printer’s preferred profile. Finally‚ a test print is always a good idea! This allows you to check the color vibrancy and overall clarity before printing multiple cards. Remember to adjust settings as needed to suit your specific printer and paper combination.

Scaling Prints for Different Card Sizes

Many printable cards are designed for standard letter size (8.5 x 11 inches)‚ but you may need to scale them for A4 paper or smaller cards. Most printers offer scaling options in their print settings. To fit an 8.5 x 11 inch design onto A4 paper‚ reduce the scale to around 94-97%.

Conversely‚ to create smaller cards‚ increase the scaling percentage. Always preview the print before finalizing to ensure the design fits correctly and isn’t distorted. Sarah Renae Clark notes her templates can be scaled for A4 printers. Experiment to find the perfect size!

Preparing the Card for Coloring

Before you begin coloring‚ ensure your printable card is properly prepared. Print the card on your chosen paper weight – heavier paper is recommended for a more premium feel. Carefully cut along the designated cut and fold lines‚ often included in the template. Sarah Renae Clark’s cards include these lines for easy assembly.

Gently fold the card along the fold lines to create the card shape. Lightly erase any stray pencil marks from cutting. Now your card is ready for your creative touch – grab your coloring tools and begin!

Assembling Your Coloring Card

Fold along the pre-marked lines for a neat finish! Add glitter‚ stickers‚ or a heartfelt message to personalize your creation. Show Mom your love!

Folding Instructions

Many printable cards include pre-cut and fold lines for ease of assembly. Carefully follow these guidelines to ensure a crisp‚ professional look. Typically‚ the card template prints on standard letter size paper (8.5 x 11 inches) and is designed to fold to approximately 5 x 7 inches.

If you’re using an A4 printer‚ you may need to scale the print slightly to maintain the correct dimensions. After coloring‚ gently fold along the indicated lines. A bone folder or the edge of a ruler can help create sharp‚ clean creases. Ensure the folds are aligned for a polished final product!

Adding Personal Touches (Glitter‚ Stickers)

Elevate your handmade card with delightful embellishments! Glitter adds a touch of sparkle and elegance‚ while stickers introduce fun and whimsical designs. Consider using adhesive gems‚ ribbon‚ or even pressed flowers for a unique‚ textured effect.

Carefully apply these additions after coloring‚ ensuring the adhesive doesn’t bleed through the paper. Remember‚ less is often more – a few strategically placed accents can make a big impact. Personalize the card to reflect your mother’s tastes and preferences‚ making it truly special!

Writing a Heartfelt Message

Beyond the beautiful colors and designs‚ a sincere message transforms your card into a cherished keepsake. Express your love‚ gratitude‚ and appreciation for everything your mother does. Share a favorite memory‚ a special quality you admire‚ or simply wish her a joyful Mother’s Day.

Don’t feel pressured to write a novel; a few heartfelt sentences are enough. Personalize the message to reflect your unique relationship. Handwritten notes add a personal touch that shows you took the time and effort to create something truly special.

Beyond the Card: Additional Activities

Enhance your gift by pairing the colored card with a small present or create a complete Mother’s Day coloring bundle for extra fun!

Pairing the Card with a Small Gift

Transform your hand-colored Mother’s Day card into an even more special gift by thoughtfully combining it with a small token of appreciation. Consider pairing the card with her favorite chocolates‚ a beautiful scented candle‚ or a cozy mug filled with her preferred tea.

Alternatively‚ a small potted plant‚ a lovely hand cream‚ or a personalized keychain can add a touch of sentimentality. The key is to choose a gift that reflects her interests and personality‚ showing her how much you care and appreciate everything she does.

Creating a Mother’s Day Coloring Page Bundle

Elevate your Mother’s Day gift by compiling a custom coloring page bundle! Supplement the coloring card with additional printable pages featuring floral designs‚ heartwarming sentiments‚ or intricate patterns. Numerous websites offer free downloadable coloring pages suitable for all ages and skill levels.

Present the bundle with a new set of coloring tools – colored pencils‚ markers‚ or crayons – to encourage a relaxing and creative activity. This thoughtful gesture provides hours of enjoyment and a lasting keepsake celebrating the special bond you share.

Resources & Links

Explore free printables at Sarah Renae Clark (coloring book artist) and Cassie Smallwood for unique card designs to color and personalize this year!

Links to Websites with Free Printables

Discover a wealth of free printable Mother’s Day cards ready for coloring! Sarah Renae Clark offers three versions‚ including pre-colored options and a DIY coloring template (https://sarahrenaeclark.com/mothers-day-coloring-cards/).

Cassie Smallwood provides 26 unique printable cards to color‚ including special designs for Grandma and Nana (https://cassiesmallwood.com/printable-mothers-day-cards-to-color/). Daydream Into Reality features over 35 free coloring cards (https://daydreamintoreality.com/mothers-day-coloring-cards/). Find more options with a quick online search!

Sarah Renae Clark Coloring Book Artist

Sarah Renae Clark is a talented coloring book artist and designer‚ offering beautiful and intricate designs for all ages. She provides a free Mother’s Day coloring card pack‚ featuring three versions – two pre-colored and one blank canvas for personalization.

These cards print on standard 8.5 x 11 paper‚ with convenient cut and fold lines‚ resulting in a 5 x 7 finished size. Scaling options are available for A4 printers or smaller cards. Explore her full collection here: https://sarahrenaeclark.com/!

Cassie Smallwood Printable Cards

Cassie Smallwood offers a collection of 26 unique printable Mother’s Day cards‚ specifically designed for coloring. Her website provides a free PDF download‚ allowing you to easily print and personalize cards at home.

Notably‚ she includes printable coloring cards dedicated to Grandma and Nana‚ expanding the options for showing appreciation. Simply click the link for your desired card to access the downloadable PDF file. Find her collection here: https://cassiesmallwood.com/!

A Meaningful Gift

Coloring printable Mother’s Day cards represent more than just a craft; they’re a tangible expression of love and thoughtfulness. Creating a personalized card allows for a unique and heartfelt gift‚ especially when combined with a small token of appreciation.

From simple floral designs to intricate patterns‚ these cards offer a creative outlet for all ages. Download‚ color‚ and share the joy – a handcrafted card is a lasting reminder of your affection!

dr david burns feeling good pdf

Dr․ David Burns’s “Feeling Good” presents cognitive behavioral therapy (CBT) techniques, offering a practical guide to mood improvement,
available as a PDF, and addressing anxieties and depression effectively․

Overview of the Book

“Feeling Good” by David D․ Burns is a comprehensive self-help guide rooted in Cognitive Behavioral Therapy (CBT)․ The book empowers readers to take control of their emotional well-being by understanding the connection between thoughts, feelings, and behaviors․ It’s widely available as a PDF, making its techniques accessible to a broader audience․

The core premise revolves around the idea that individuals have the power to change how they feel by modifying their thought patterns․ Burns provides practical tools, like thought records, to identify and challenge negative thinking․ A revised edition includes a consumer’s guide to antidepressant drugs, offering a balanced perspective on treatment options․ The handbook addresses issues like anxiety, phobias, panic attacks, and depression, offering strategies for lasting positive change․

The Core Principles of Cognitive Behavioral Therapy (CBT)

Dr․ David Burns’s work, particularly in “Feeling Good” (often found as a PDF), centers on the principles of Cognitive Behavioral Therapy (CBT)․ CBT posits that our thoughts, not external events, directly influence our feelings and behaviors․ It’s a collaborative, goal-oriented approach focused on identifying and modifying unhelpful thought patterns․

A key tenet is recognizing cognitive distortions – inaccurate or irrational ways of thinking․ Burns emphasizes that these distortions contribute to negative emotions․ CBT aims to replace these with more realistic and balanced thoughts․ The therapy, as presented in the handbook, is based on the premise that individuals can learn to change the way they look and feel, ultimately improving their mental wellness․

David Burns’ Approach to Mental Wellness

Dr․ David Burns’s approach, detailed in resources like “The Feeling Good Handbook” (PDF version widely available), champions self-directed change․ He empowers individuals to become their own therapists, utilizing techniques from Cognitive Behavioral Therapy (CBT)․ Burns believes people create their own moods and can learn to alter their perspectives․

His method focuses on practical exercises, such as thought records and cost-benefit analyses, to challenge negative thinking․ He also provides a Consumer’s Guide to Antidepressant Drugs, encouraging informed decisions․ Burns’s work addresses a range of issues, including anxiety, depression, phobias, and obsessive-compulsive disorder, offering a path towards lasting mental wellbeing․

Understanding Your Moods

Dr․ Burns’s work, including the “Feeling Good” PDF, emphasizes that moods stem from thoughts, feelings, and behaviors—a cycle individuals can learn to control․

The Connection Between Thoughts, Feelings, and Behaviors

Dr․ David Burns’s core principle, detailed in “Feeling Good” and its PDF version, revolves around the interconnectedness of thoughts, feelings, and behaviors․ He posits that it isn’t external events themselves that dictate our emotional state, but rather our interpretation of those events․

Negative or distorted thoughts directly fuel negative feelings, which, in turn, influence our behaviors․ This creates a self-perpetuating cycle․ For example, a thought like “I’m going to fail” can lead to feelings of anxiety and ultimately, avoidance behaviors like procrastination․

Conversely, by identifying and challenging these negative thought patterns – a key technique in the handbook – individuals can alter their feelings and behaviors, breaking the cycle and fostering a more positive outlook․ The PDF provides tools to actively work through this process․

Identifying Negative Thought Patterns

Dr․ David Burns’s “Feeling Good” handbook, readily available as a PDF, emphasizes the crucial first step in mood improvement: recognizing recurring negative thought patterns․ These aren’t simply “bad thoughts,” but habitual ways of interpreting experiences that contribute to emotional distress․

Common patterns include all-or-nothing thinking, overgeneralization, mental filtering (focusing solely on negatives), discounting the positive, jumping to conclusions, magnification of errors, and emotional reasoning (“I feel it, therefore it must be true”)․

The PDF guides readers through exercises, like thought records, to pinpoint these patterns in their own lives․ Becoming aware of these automatic negative thoughts is essential for challenging their validity and replacing them with more balanced and realistic perspectives, ultimately leading to improved emotional well-being․

The Role of Cognitive Distortions

Dr․ David Burns’s “Feeling Good” handbook, accessible as a PDF, highlights cognitive distortions as the core drivers of negative emotions․ These distortions are inaccurate or irrational ways of thinking that skew our perception of reality, leading to feelings of sadness, anxiety, and anger․

The PDF details numerous distortions, including catastrophizing, personalization, should statements, and labeling․ These aren’t conscious lies, but rather automatic, ingrained thought habits․ Recognizing these distortions is vital because they aren’t based on facts, but on faulty interpretations․

Burns’s techniques, outlined in the handbook, teach readers to identify these distortions in their own thinking and challenge their validity, fostering a more balanced and rational outlook, ultimately improving emotional health․

Techniques for Mood Improvement

Dr․ Burns’s “Feeling Good” PDF offers tools like thought records and cost-benefit analysis to challenge negative thoughts and actively improve emotional wellbeing․

Thought Records: A Step-by-Step Guide

Dr․ David Burns’s “Feeling Good” PDF emphasizes thought records as a core CBT technique․ Begin by identifying a distressing situation․ Next, record the negative automatic thoughts that arose during that event – be specific! Then, detail the emotions you experienced, rating their intensity․

Crucially, challenge these thoughts by seeking evidence for and against them․ Develop alternative, more balanced thoughts․ Finally, re-rate your emotions․ This process, repeated consistently, helps dismantle unhelpful thinking patterns․ The handbook provides detailed examples and worksheets to guide you through each step, fostering self-awareness and emotional regulation․ It’s a powerful tool for taking control of your moods․

Challenging Negative Thoughts

Dr․ David Burns’s “Feeling Good” PDF details methods for actively challenging negative thoughts․ A key technique involves questioning the evidence supporting these thoughts – are they based on facts or feelings? Identify cognitive distortions, like all-or-nothing thinking or catastrophizing, as highlighted in the handbook․

Ask yourself: “What’s the worst that could realistically happen?” and “What’s the probability of that?” Explore alternative explanations for the situation․ Reframe negative self-talk into more balanced and realistic statements․ Regularly practicing these challenges, as outlined in the guide, weakens the grip of negative thinking and promotes emotional well-being․

The “Cost-Benefit Analysis” Technique

Dr․ David Burns’s “Feeling Good” PDF introduces the “Cost-Benefit Analysis” as a powerful tool for evaluating behaviors and thought patterns․ This technique involves systematically listing the advantages and disadvantages of continuing a particular thought or action․

Carefully consider both short-term and long-term consequences․ Often, behaviors maintained by negative thoughts offer only short-term relief while creating long-term problems․ By objectively weighing the costs against the benefits, individuals can gain clarity and make more informed decisions․ The handbook emphasizes that this process can reveal that the perceived benefits are minimal compared to the significant emotional costs․

Dealing with Anxiety and Fears

Dr․ David Burns’s “Feeling Good” PDF details strategies like exposure therapy and managing panic attacks, helping readers confront and overcome anxieties and phobias effectively․

Understanding the Physiology of Anxiety

Dr․ David Burns, in “Feeling Good” and its PDF version, explains that anxiety isn’t simply a psychological state, but also manifests physically․ He details how the body reacts to perceived threats, triggering the fight-or-flight response․ This involves physiological changes like increased heart rate, rapid breathing, muscle tension, and sweating․

Understanding these physical sensations is crucial, as they can be misinterpreted as signs of danger, further fueling anxiety․ Burns emphasizes that recognizing these are symptoms of anxiety, not inherently dangerous, is a key step in managing it․ The handbook provides insights into how cognitive distortions can amplify these physical sensations, creating a vicious cycle․ By understanding the body’s response, individuals can begin to challenge anxious thoughts and regain control․

Exposure Therapy: Facing Your Fears

Dr․ David Burns’s “Feeling Good” PDF details exposure therapy as a powerful technique for overcoming fears and phobias․ It involves gradually confronting feared situations or objects, starting with less anxiety-provoking scenarios and progressively increasing the challenge․ This systematic desensitization helps break the association between the feared stimulus and the anxious response․

Burns stresses the importance of creating a “fear hierarchy,” ranking fears from least to most distressing․ The handbook guides readers through constructing this hierarchy and implementing exposure exercises․ By repeatedly facing fears in a controlled manner, individuals learn that their anticipated catastrophic outcomes rarely materialize, reducing anxiety over time․ It’s a core CBT method detailed within the guide․

Strategies for Managing Panic Attacks

Dr․ David Burns’s “Feeling Good” PDF provides practical strategies for managing panic attacks, emphasizing that they are not dangerous, despite the intense physical sensations․ The book details techniques to challenge catastrophic interpretations of these sensations – recognizing them as temporary and harmless․

Burns advocates for techniques like deep breathing exercises and progressive muscle relaxation to counteract the physiological symptoms of panic․ He also highlights the importance of “stopping the thought” – interrupting the cycle of anxious thoughts that fuel the attack․ The handbook encourages readers to confront panic-provoking situations, utilizing exposure therapy principles to diminish fear and regain control, ultimately reducing the frequency and intensity of attacks․

Overcoming Depression

Dr․ David Burns’s “Feeling Good” PDF offers techniques to identify and challenge depressive thought patterns, promoting behavioral activation and self-compassion for recovery․

Identifying Depressive Thought Patterns

Dr․ David Burns’s “Feeling Good” PDF emphasizes recognizing negative thought patterns central to depression․ These aren’t simply sad thoughts, but distorted views influencing mood and behavior․ The handbook details common patterns like all-or-nothing thinking – seeing things as black or white, with no middle ground – and catastrophizing, exaggerating potential negative outcomes․

Other patterns include mental filtering, focusing solely on negatives while ignoring positives, and disqualifying the positive, rejecting positive experiences as unimportant․ “Feeling Good” guides readers to pinpoint these distortions within their own thinking, using techniques like thought records to document and analyze these patterns․ Identifying these is the crucial first step towards challenging and changing them, ultimately lifting depressive symptoms․

Behavioral Activation: Re-engaging with Life

Dr․ David Burns’s “Feeling Good” PDF highlights behavioral activation as a core strategy for overcoming depression․ This technique focuses on re-introducing enjoyable and meaningful activities into daily life, even when motivation is low․ Depression often leads to withdrawal and inactivity, exacerbating negative feelings․

The handbook encourages creating a schedule of activities, starting small and gradually increasing engagement․ It’s not about feeling motivated, but acting as if you are․ Success isn’t measured by enjoyment initially, but by simply completing the activity․ “Feeling Good” emphasizes that positive feelings often follow action, breaking the cycle of inactivity and despair․ This proactive approach empowers individuals to regain control and improve their mood․

The Importance of Self-Compassion

Dr․ David Burns’s “Feeling Good” PDF, while rooted in cognitive techniques, subtly emphasizes the importance of self-compassion․ Often, individuals struggling with depression or anxiety are harshly self-critical, perpetuating negative thought patterns․ The handbook encourages treating oneself with the same kindness and understanding one would offer a friend․

This involves recognizing common humanity – understanding that suffering is a shared experience – and avoiding self-judgment․ “Feeling Good” promotes replacing self-criticism with supportive self-talk․ Acknowledging imperfections without harsh condemnation is crucial for emotional wellbeing․ Cultivating self-compassion isn’t about letting oneself off the hook, but fostering a more constructive and encouraging inner dialogue․

The “Feeling Good” Handbook PDF

Dr․ David Burns’s “Feeling Good” PDF offers accessible mental health strategies, including techniques for managing moods, anxiety, and depression, for convenient self-help․

Accessing the PDF Version

Dr․ David Burns’s “Feeling Good Handbook” in PDF format is readily available through various online platforms․ Resources like the Internet Archive offer free download and streaming options, providing convenient access to this valuable self-help guide․ Websites such as DOKUMEN․PUB also host the PDF, though users should exercise caution regarding download sources․

Searching directly for “Feeling Good Handbook PDF” will yield numerous results, but verifying the legitimacy of the source is crucial; The digital format allows for easy portability and accessibility on multiple devices, making the techniques within readily available whenever and wherever they are needed․ Ensure the PDF is from a reputable source to guarantee the integrity of the content and avoid potential security risks․

Benefits of Using the Digital Format

The PDF version of Dr․ David Burns’s “Feeling Good Handbook” offers significant advantages over traditional print․ Its portability allows users to access proven CBT techniques on smartphones, tablets, or computers, facilitating on-the-go self-help․ The digital format enables easy searching for specific exercises or concepts, streamlining the learning process․

Furthermore, the PDF is often more affordable than a physical copy and eliminates shipping costs․ Features like zoom functionality enhance readability, and the ability to copy and paste text aids in note-taking and application of the techniques․ Having the handbook readily available as a PDF encourages consistent practice and integration of CBT principles into daily life, promoting lasting mental wellness․

Navigating the Handbook’s Contents

The PDF of Dr․ David Burns’s “Feeling Good Handbook” is logically structured for effective self-help․ It begins with foundational concepts, explaining the link between thoughts, feelings, and behaviors․ Subsequent sections detail techniques like thought records and challenging negative thoughts․

The handbook progresses to address specific issues – anxiety, depression, and phobias – offering tailored strategies․ A valuable “Consumer’s Guide to Antidepressant Drugs” provides balanced information․ Utilizing the PDF’s search function is key to quickly locating relevant chapters or exercises․ The table of contents serves as a roadmap, guiding users through the material․ Consistent engagement with the handbook’s contents fosters lasting positive change․

Advanced CBT Techniques

Dr․ Burns’s work extends to schema therapy and the downward arrow technique, delving into core beliefs, while behavioral experiments test thought validity, as found in the PDF․

Schema Therapy: Addressing Core Beliefs

Schema therapy, an advanced technique detailed within Dr․ David Burns’s “Feeling Good” PDF, focuses on identifying and modifying deeply ingrained, maladaptive core beliefs – often stemming from childhood experiences․ These schemas, or patterns, significantly influence how individuals perceive themselves, others, and the world․

Unlike simply challenging surface-level negative thoughts, schema therapy aims to uncover the origins of these beliefs․ The process involves exploring early life experiences and understanding how they contributed to the development of these enduring patterns․ By recognizing these schemas, individuals can begin to challenge their validity and develop more realistic and adaptive ways of thinking and behaving․

The PDF resource provides guidance on identifying common schemas, such as abandonment, mistrust/abuse, and defectiveness/shame, and offers strategies for working through the emotional pain associated with them․ It’s a powerful approach for lasting change․

Downward Arrow Technique

The Downward Arrow Technique, a core component of Dr․ David Burns’s “Feeling Good” methodology – readily accessible in the PDF version – is a powerful tool for uncovering underlying assumptions and beliefs fueling negative emotions․ It involves repeatedly asking “What if?” in response to a negative thought, digging deeper to reveal the core fears driving distress․

This technique isn’t about logical debate, but rather about emotional excavation․ By continually questioning the implications of a thought, individuals can expose the catastrophic predictions and hidden assumptions that maintain their negative mood․ The PDF illustrates how to systematically apply this technique, prompting a cascade of “What if?” questions․

Ultimately, the goal is to identify the most fundamental, often irrational, belief at the root of the problem, paving the way for effective cognitive restructuring․

Behavioral Experiments

Behavioral Experiments, detailed within Dr․ David Burns’s “Feeling Good” handbook – conveniently available as a PDF – are a cornerstone of Cognitive Behavioral Therapy (CBT)․ They involve actively testing the validity of negative thoughts and beliefs in real-world situations, rather than relying on internal debate․

These aren’t simply about “trying” something; they’re carefully designed tests with specific predictions․ The PDF guides readers through formulating a hypothesis based on a negative thought, then conducting an experiment to gather evidence for or against it․

By confronting feared situations and objectively observing the outcomes, individuals can challenge distorted thinking patterns and develop more realistic perspectives, ultimately improving mood and reducing anxiety․

Specific Applications of CBT

Dr․ Burns’s “Feeling Good” PDF details CBT’s effectiveness in treating social anxiety, obsessive-compulsive disorder, and phobias, offering targeted techniques for each condition․

Treating Social Anxiety

Dr․ David Burns’s “Feeling Good” PDF provides specific CBT strategies for overcoming social anxiety, rooted in identifying and challenging negative thought patterns․ The handbook emphasizes recognizing cognitive distortions fueling fears of judgment or embarrassment in social situations․

Techniques like thought records and behavioral experiments are crucial; individuals learn to test the validity of anxious predictions․ Exposure therapy, gradually confronting feared social interactions, is also highlighted․ The guide encourages readers to differentiate between realistic concerns and exaggerated anxieties․

Furthermore, it stresses the importance of self-compassion and accepting imperfections, reducing the pressure to perform flawlessly․ By applying these principles, individuals can diminish social anxiety and build confidence in interpersonal settings, as detailed within the PDF․

Managing Obsessive-Compulsive Disorder (OCD)

Dr․ David Burns’s “Feeling Good” PDF offers a CBT-based approach to managing Obsessive-Compulsive Disorder (OCD), focusing on breaking the cycle of obsessions and compulsions․ The handbook details how to identify intrusive thoughts and resist the urge to perform neutralizing rituals․

Exposure and Response Prevention (ERP) is a key technique, involving confronting obsessive fears without engaging in compulsive behaviors․ Readers learn to tolerate anxiety and challenge the belief that compulsions are necessary to prevent harm․

The guide emphasizes recognizing cognitive distortions that amplify obsessive fears and provides tools for thought challenging․ It also highlights the importance of accepting uncertainty and reducing the need for absolute certainty, as outlined in the PDF’s practical exercises․

Addressing Phobias

Dr․ David Burns’s “Feeling Good” PDF provides a structured approach to overcoming phobias using Cognitive Behavioral Therapy (CBT) principles․ The handbook emphasizes that phobias are maintained by avoidance behaviors and negative thought patterns․

A core technique is gradual exposure therapy, where individuals progressively confront feared situations, starting with less anxiety-provoking scenarios and building up to more challenging ones․ This process, detailed in the PDF, helps desensitize individuals to their fears․

The guide also teaches readers to identify and challenge irrational beliefs fueling their phobias․ By reframing negative thoughts and accepting anxiety as a temporary discomfort, individuals can regain control and reduce their phobic responses, as explained within the handbook’s exercises․

The Consumer’s Guide to Antidepressant Drugs

Dr․ Burns’s “Feeling Good” PDF includes a comprehensive guide to antidepressants, weighing risks and benefits, and exploring alternatives to medication for depression․

Understanding Antidepressant Medications

Dr․ David Burns, within the “Feeling Good” handbook and its PDF version, dedicates a section to demystifying antidepressant medications․ He emphasizes the importance of informed decision-making, urging readers to understand how these drugs function and their potential impact on brain chemistry․

Burns details various classes of antidepressants, explaining their mechanisms of action – such as selective serotonin reuptake inhibitors (SSRIs) and tricyclic antidepressants – in accessible language․ He stresses that these medications aren’t “magic bullets” but can be helpful tools when used appropriately, often in conjunction with CBT techniques outlined throughout the book․

The guide encourages patients to actively discuss their concerns and expectations with their doctors, ensuring a collaborative approach to treatment․ Understanding the nuances of antidepressant medications is crucial for navigating mental health care effectively․

Weighing the Risks and Benefits

Dr․ David Burns’s “Feeling Good” handbook, accessible as a PDF, provides a balanced perspective on antidepressant medication․ He meticulously outlines potential benefits, such as symptom reduction in moderate to severe depression, and improved quality of life for some individuals․

However, Burns doesn’t shy away from detailing the risks, including common side effects like weight gain, sexual dysfunction, and sleep disturbances․ He also addresses more serious, though less frequent, concerns․

The guide emphasizes that the decision to take antidepressants should be made collaboratively with a healthcare professional, carefully considering individual circumstances and a thorough assessment of potential risks versus benefits․ It’s a nuanced discussion, promoting informed consent and patient empowerment․

Alternatives to Medication

Dr․ David Burns’s “Feeling Good” handbook, readily available as a PDF, strongly advocates for exploring alternatives to medication, particularly for mild to moderate depression and anxiety․ The core of his approach lies in Cognitive Behavioral Therapy (CBT) techniques, empowering individuals to actively change their thought patterns and behaviors․

Burns details strategies like thought records, challenging negative thoughts, and behavioral activation – re-engaging with enjoyable activities․ He emphasizes self-compassion and building resilience․

The guide suggests that for many, these self-help methods, combined with therapy, can be as effective, or even more so, than medication, with fewer side effects․ It’s a message of hope and self-efficacy, promoting a proactive approach to mental wellness․

brother hll2390dw manual

Brother HL-L2390DW Manual: Comprehensive Article Plan (12/05/2025)

Today’s date is 12/05/2025. This manual provides detailed instructions for the Brother HL-L2390DW, covering setup, printing, scanning, and troubleshooting, referencing Brother’s Solutions Center.

The HL-L2390DW is a monochrome laser multifunction printer. It offers reliable printing, scanning, and connectivity options, supported by downloadable drivers and software from Brother Canada’s website.

Overview of the Printer

The Brother HL-L2390DW is a compact, monochrome laser printer designed for home and small office use. It combines printing, scanning, and copying functionalities into a single device. This model boasts automatic duplex printing, saving paper and reducing costs. Connectivity options include USB, Ethernet, and Wi-Fi, offering flexible network integration.

Users can access comprehensive support, including downloadable drivers and manuals, through the Brother Solutions Center. The printer’s capabilities are enhanced with optional refresh subscription services, ensuring continued functionality and access to the latest features. It’s a versatile machine for everyday document needs.

Key Features and Benefits

The Brother HL-L2390DW excels with its high-speed printing – up to 36 pages per minute. Automatic duplex printing significantly reduces paper consumption, lowering operational costs. Wireless connectivity simplifies placement and sharing across devices. The intuitive control panel ensures ease of use, while the built-in scanner adds versatility.

Benefits include access to the Brother Solutions Center for drivers and support, plus optional refresh subscriptions. ControlCenter software streamlines scanning tasks. Its compact design fits neatly into any workspace, offering reliable performance for daily printing demands.

Target Audience for this Manual

This manual is designed for both novice and experienced users of the Brother HL-L2390DW printer. It caters to home office users, small business professionals, and students requiring a reliable monochrome laser printer with scanning capabilities. Individuals comfortable with basic computer operations will easily follow the step-by-step instructions.

The guide also assists IT administrators responsible for network setup and driver installations. Users seeking to maximize printer functionality, troubleshoot common issues, or understand advanced settings will find this resource invaluable, leveraging support from Brother’s online resources.

Unboxing and Setup

Carefully unpack the box, verifying all components are present. Initial setup involves connecting the printer to power and a computer, following the quick setup guide.

Contents of the Box

Upon unboxing your Brother HL-L2390DW, ensure all listed items are included. You should find the printer itself, a toner cartridge (starter yield), a drum unit, a power cord, a USB cable for direct connection to your computer, and a quick setup guide. Additionally, there’s a safety instruction manual and warranty information. Verify the presence of all these components before proceeding with the setup process. Missing items should be reported to Brother customer support immediately for prompt resolution and replacement, ensuring a smooth start with your new printer.

Initial Setup Procedures

Begin by removing all packing materials and protective tape from the printer. Install the toner cartridge and drum unit following the diagrams in the quick setup guide. Connect the power cord and turn the printer on. For network setup, access the printer’s menu via the control panel. Follow the on-screen prompts to connect to your Wi-Fi network or utilize the USB connection. Download and install the full driver and software package from the Brother Solutions Center for complete functionality.

Connecting to Power and Computer

Ensure the printer is powered off before connecting the power cord to a grounded outlet. For a USB connection, use a compatible USB 2.0 cable to connect the printer directly to your computer. The printer will be automatically detected during software installation. For network connectivity, verify the printer is on the same network as your computer. Download drivers from the Brother Solutions Center and follow the installation wizard to establish communication.

Understanding the Control Panel

The control panel features buttons for Go, Stop, and Back, alongside a display showing printer status and error messages for easy operation.

Button Functions Explained

The ‘Go’ button initiates printing or starts a specific function selected on the display. ‘Stop’ immediately halts the current process, like printing or copying, offering quick intervention. The ‘Back’ button navigates you to the previous menu or screen, allowing for easy correction of selections. These buttons, combined with the display indicators, provide intuitive control over the HL-L2390DW’s functions. Understanding these simple controls streamlines operation, minimizing errors and maximizing efficiency. The panel’s design prioritizes user-friendliness, ensuring even novice users can quickly master the printer’s core functionalities.

Display Indicators and Messages

The printer’s display utilizes various indicators to communicate its status. A flashing ‘Toner’ light signals low toner levels, prompting replacement. The ‘Drum’ indicator alerts to drum unit status, requiring attention after a set number of pages. Error messages, displayed as codes, pinpoint specific issues like paper jams or connectivity problems. Referencing the manual’s troubleshooting section decodes these messages for swift resolution. Understanding these indicators and messages is crucial for proactive maintenance and efficient operation, preventing unexpected downtime and ensuring consistent print quality.

Paper Handling

This section details supported paper types and sizes for the HL-L2390DW. Proper loading techniques and solutions for resolving frustrating paper jams are explained clearly.

Supported Paper Types and Sizes

The Brother HL-L2390DW handles a variety of paper, ensuring versatility for diverse printing needs. Supported types include plain paper, recycled paper, and thicker specialty papers. Standard paper sizes are letter, legal, executive, A4, A5, and A6. Envelope support includes #10, Monarch, and C5. Maximum paper capacity is 250 sheets in the tray. Weight compatibility ranges from 16 lb to 43 lb. Always check paper specifications for optimal print quality and to avoid potential jams, referencing the full manual for detailed guidance.

Loading Paper into the Tray

Proper paper loading is crucial for reliable printing with the Brother HL-L2390DW. First, extend the paper tray fully. Adjust the paper guides to match the paper width, ensuring they aren’t too tight. Fan the stack of paper to prevent sticking, then load it face down. Confirm the paper stack is below the tray’s maximum fill line. Finally, gently slide the tray back into the printer. Incorrect loading can lead to paper jams or skewed prints.

Resolving Paper Jams

Paper jams require careful attention to avoid damaging the Brother HL-L2390DW. Power off the printer and open the rear cover. Gently remove any visible jammed paper, pulling in the direction of the paper path. Check the front access panel and remove any additional jams. Avoid using tools that could tear the paper. Re-close all covers securely before restarting the printer. Frequent jams may indicate incorrect paper type or loading.

Printing Basics

This section details printing from both Windows and macOS. Utilize the full driver and software package downloaded from the Brother Solutions Center for optimal results.

Printing from Windows

To print from Windows, ensure the full driver and software package is installed. Access printing options through the application you’re using – typically “File” then “Print”. Select the Brother HL-L2390DW from the list of available printers.

Adjust print quality settings within the driver properties for desired results. Consider options like print speed, resolution, and paper type. Preview your document before printing to confirm layout and content. The Brother Solutions Center provides downloadable drivers and detailed instructions for a seamless printing experience on Windows systems.

Printing from macOS

For macOS users, download the appropriate Brother Scanner Driver (TWAIN) from the Brother Solutions Center. Initiate printing from your application by selecting “File” and then “Print”. Choose the Brother HL-L2390DW printer from the available options.

Access printer settings to customize print quality, paper size, and orientation. Note that ControlCenter is not supported on macOS 11 or later; utilize native macOS printing features. Refer to the downloaded manual for detailed macOS-specific printing guidance.

Print Quality Settings

Adjusting print density impacts the toner usage and darkness of your prints. Access print quality settings through the printer driver on your computer. Options typically include standard, fine, and extra-fine quality. Experiment to find the optimal balance between print quality and toner consumption.

Higher quality settings consume more toner. Consider the document type when selecting a setting; drafts require less quality than professional documents. Refer to the manual for detailed explanations of each quality level.

Scanning Basics

ControlCenter software facilitates scanning to your computer. Install the full driver package (Windows) or Brother Scanner Driver (macOS) to utilize scanning functionalities effectively.

Installing Scanning Software (ControlCenter)

To enable scanning functionality, install the ControlCenter software. For Windows users, download and run the “Full Driver and Software Package” from the Brother Solutions Center. Macintosh users require the “Brother Scanner Driver (TWAIN).” Note that ControlCenter is unsupported on macOS 11 or later; alternative scanning methods are then necessary. The PaperPort Install Tool, available via Brother support, can also assist with software acquisition. Ensure your Brother machine is connected to your computer or network before initiating the installation process for optimal results.

Scanning to Computer

After installing the necessary scanning software (ControlCenter or TWAIN driver), you can scan documents directly to your computer. Launch the software and select your desired scan settings, including resolution and file format. Ensure the Brother HL-L2390DW is connected and recognized by your system. Follow the on-screen prompts to initiate the scan. Scanned files can then be saved and accessed from your computer’s designated folder, streamlining document digitization.

Scan Resolution and File Formats

The Brother HL-L2390DW offers adjustable scan resolutions, impacting image clarity and file size. Higher resolutions (measured in DPI) yield detailed scans but create larger files. Supported file formats typically include PDF, JPEG, and TIFF, catering to diverse needs. PDF is ideal for documents, while JPEG suits photos. ControlCenter allows selecting these options before scanning, ensuring optimal output quality and efficient storage based on your requirements.

Network Connectivity

This section details connecting the HL-L2390DW to Wi-Fi or a wired network, enabling shared printing and scanning, and troubleshooting common network-related issues.

Connecting to a Wi-Fi Network

Establishing a wireless connection allows convenient printing and scanning from multiple devices. Begin by verifying your Brother HL-L2390DW is within range of your Wi-Fi router. Access the printer’s menu via the control panel, navigating to Network settings. Select ‘WLAN Setup Wizard’ and choose your network from the available list.

Enter your Wi-Fi password accurately when prompted; incorrect credentials will prevent connection. Once connected, confirm the printer obtains an IP address. Utilize the Brother iPrint&Scan app for mobile printing, ensuring your device and printer are on the same network. Refer to the manual for advanced Wi-Fi settings.

Setting up a Wired Network Connection

A wired connection offers a stable and secure network link for your Brother HL-L2390DW. Locate the Ethernet port on the printer’s rear panel and connect it to your router or network switch using a standard Ethernet cable. Ensure the cable is securely plugged into both devices.

The printer will automatically obtain an IP address via DHCP. Verify connectivity through the printer’s network settings menu, confirming the IP address is assigned. This method is ideal for environments prioritizing consistent network performance and security, bypassing potential Wi-Fi interference.

Troubleshooting Network Issues

Network connectivity problems with your Brother HL-L2390DW can often be resolved with basic checks. First, verify the Ethernet cable is securely connected, or confirm Wi-Fi credentials are correct. Restart both the printer and your router. Check the printer’s network settings to ensure it has obtained a valid IP address.

If issues persist, consult the Brother Solutions Center for specific error codes and troubleshooting guides. Ensure your firewall isn’t blocking printer communication. A network reset on the printer may also restore connectivity.

Driver Installation and Updates

Access the Brother Solutions Center for the latest drivers and software. Download the full package for complete functionality, ensuring Windows 11 compatibility where available.

Downloading Drivers from Brother Solutions Center

To obtain the necessary drivers, navigate to the Brother Solutions Center website. You can search by model number (HL-L2390DW) or browse through the product categories. Once located, select the appropriate operating system – Windows or macOS – to filter compatible downloads.

Available downloads include full driver and software packages, scanner drivers (like TWAIN for macOS), and utilities. Ensure you download the correct version for optimal performance and compatibility. Regularly checking for updates within the Solutions Center is recommended to maintain functionality and address potential issues.

Installing Full Driver and Software Package

After downloading the full driver and software package from the Brother Solutions Center, locate the downloaded file (likely an .exe for Windows). Double-click the file to initiate the installation wizard. Follow the on-screen prompts, accepting license agreements and choosing installation options.

The package includes essential components like the printer driver, ControlCenter for scanning, and potentially PaperPort. Ensure your Brother machine is connected to your computer or network during installation for proper detection and configuration.

Windows 11 Compatibility and Driver Support

Brother provides varying levels of Windows 11 support for the HL-L2390DW. Check the Brother Solutions Center for specific driver availability for your model; some models lack dedicated Windows 11 drivers.

If a dedicated driver isn’t available, Windows 10 drivers may function, but functionality isn’t guaranteed, and support is limited. Brother doesn’t guarantee compatibility and offers no support for this alternative method. Always prioritize installing the correct, dedicated driver when available.

Maintenance and Troubleshooting

Regular cleaning and toner replacement are vital. Refer to the manual for error message solutions and procedures for resolving common printer issues efficiently.

Cleaning the Printer

Maintaining a clean printer ensures optimal performance and longevity. Regularly inspect and gently clean the interior of the Brother HL-L2390DW to remove any toner residue or paper dust. Use a soft, lint-free cloth – avoid abrasive cleaners. Carefully wipe the internal components, focusing on areas where toner might accumulate.

Pay attention to the paper path and the corona wire. Always power off the printer and disconnect it from the power source before cleaning. Refer to the detailed diagrams in the user manual for specific cleaning locations and procedures to prevent damage. Consistent cleaning prevents print quality issues.

Replacing the Toner Cartridge

When print quality fades, it’s time to replace the toner cartridge in your Brother HL-L2390DW. First, ensure the printer is powered on. Open the front cover to access the toner cartridge. Gently remove the old cartridge by pulling the handle, then dispose of it responsibly.

Unpack the new toner cartridge, remove the protective cover, and shake it gently to distribute the toner. Insert the new cartridge firmly into the slot until it clicks. Close the front cover, and the printer is ready for use.

Common Error Messages and Solutions

Encountering errors? The Brother HL-L2390DW displays messages to guide you. “Toner Low” indicates replacement is soon needed. “No Paper” means to load paper into the tray. A “Jam” error requires carefully removing stuck paper, following the printer’s diagram.

If you see a general error, try restarting the printer. Check all cable connections. Refer to the Brother Solutions Center website for specific error codes and detailed troubleshooting steps, ensuring optimal printer performance.

Advanced Settings

Customize your HL-L2390DW! Explore security features, adjust print density for optimal quality, and manage user accounts for controlled access and personalized printing experiences.

Configuring Security Settings

Protecting your printer and network is crucial. The Brother HL-L2390DW offers several security features accessible through the web interface. These include securing network communication with protocols like SSL/TLS, enabling secure print where jobs require a PIN for release, and restricting access based on IP addresses.

You can also disable certain network protocols you aren’t using to minimize potential vulnerabilities. Regularly review and update these settings to maintain a secure printing environment, safeguarding sensitive documents and preventing unauthorized access to your printer’s functionalities. Refer to the full manual for detailed steps.

Adjusting Print Density

Fine-tuning print density optimizes output quality and toner usage. Access the print density settings through the printer’s web interface or the printer driver on your computer. Experiment with different density levels to achieve the desired darkness and clarity for your prints.

Higher density uses more toner, resulting in darker prints, while lower density conserves toner but may produce lighter output. Consider the type of document being printed – text versus graphics – when making adjustments for optimal results.

Managing User Accounts

The Brother HL-L2390DW doesn’t natively support individual user accounts for print management. However, you can leverage operating system-level user account controls and network printing permissions to manage access.

For Windows environments, utilize Windows user accounts and printer sharing settings. On macOS, employ macOS user accounts and printer configuration. This approach allows administrators to restrict printing privileges based on user roles, enhancing security and controlling print costs within an organization.

the most dangerous game by richard connell pdf

The Most Dangerous Game by Richard Connell PDF: A Comprehensive Guide (Updated 12/05/2025)

Today, December 5th, 2025, readers seek digital access to Richard Connell’s thrilling tale; understanding PDF availability, legality, and reliable sources is crucial for enthusiasts.

Richard Connell’s “The Most Dangerous Game,” published in 1924, remains a cornerstone of adventure and suspense literature. The story captivates readers with its chilling premise: a big-game hunter, Sanger Rainsford, finds himself unexpectedly hunted on a remote island by the aristocratic General Zaroff.

The narrative explores themes of civilization versus savagery, the ethics of hunting, and the psychological battle between predator and prey. Its enduring popularity has led to numerous adaptations, including film and, most recently, a television series on Peacock (seasons 1 & 2), sparking interest in finding a “The Most Dangerous Game PDF” for study or leisure.

This guide provides a comprehensive overview, addressing the availability of digital versions, legal considerations, and resources for deeper analysis of this classic short story. We will also touch upon speculation regarding “The Most Dangerous Game” Season 3.

The Original Short Story: Historical Context

Published in 1924, “The Most Dangerous Game” emerged during a period of heightened fascination with exploration, adventure, and the perceived clash between civilization and the “wild.” The Roaring Twenties witnessed a surge in popular adventure fiction, reflecting a post-war desire for escapism and thrilling narratives.

Connell, a seasoned writer for pulp magazines, tapped into this zeitgeist. The story’s themes resonated with anxieties about societal norms and the darker aspects of human nature. The accessibility of the story, often found in collections and now sought as a “The Most Dangerous Game PDF,” contributed to its widespread influence.

Understanding this historical backdrop illuminates the story’s enduring appeal and its continued relevance in discussions of morality and the human condition, even influencing modern thrillers and the recent Peacock adaptation.

Richard Connell: Author Biography and Influences

Richard Connell (1893-1949) was a prolific American author known for his adventure and mystery stories, frequently published in popular magazines like Collier’s. His experiences as a journalist and his time spent in the military likely informed his writing, contributing to the realistic and suspenseful elements found in “The Most Dangerous Game.”

Connell’s work often explored themes of survival, the thrill of the hunt, and the complexities of human morality. He drew inspiration from diverse sources, including his travels and a keen interest in big-game hunting. The enduring popularity of “The Most Dangerous Game,” readily available as a “The Most Dangerous Game PDF,” demonstrates his lasting impact on the genre.

His concise and gripping style continues to captivate readers today.

Finding a “The Most Dangerous Game PDF” ⎼ Legality and Sources

Locating a “The Most Dangerous Game PDF” requires careful consideration of copyright law. As the original story is in the public domain, many legitimate sources offer free PDFs. However, be wary of websites offering PDFs with unauthorized alterations or bundled with malware.

Downloading from unofficial sources carries risks, potentially violating copyright and exposing your device to security threats. Prioritize reputable platforms like Project Gutenberg (discussed further below) or authorized digital retailers. Always verify the source before downloading to ensure a safe and legal reading experience. A legitimate PDF will accurately reflect Richard Connell’s original work.

Project Gutenberg and Free Online Versions

Project Gutenberg stands as a premier, legally sound source for a “The Most Dangerous Game PDF”. This volunteer effort digitizes and archives free ebooks, including Connell’s classic. The Project Gutenberg version ensures an accurate reproduction of the original 1924 short story, free from copyright concerns.

Authorized Digital Editions and Retailers

For a guaranteed legitimate copy of “The Most Dangerous Game,” consider purchasing a digital edition from authorized retailers. Platforms like Amazon Kindle, Barnes & Noble Nook, and Apple Books offer the story for a small fee, supporting copyright holders and ensuring quality. These editions often include enhanced features like adjustable font sizes and built-in dictionaries.

While free options exist, purchasing supports authors and publishers. Retailer versions are typically DRM-protected, preventing unauthorized distribution. Google Play Books is another reliable source. These authorized PDFs provide a secure and convenient reading experience, free from the risks associated with potentially harmful, pirated files.

Beware of Pirated PDFs: Risks and Concerns

Downloading “The Most Dangerous Game” PDF from unofficial sources carries significant risks. Pirated PDFs often contain malware, viruses, and spyware, compromising your device and personal data. These files can lead to identity theft, financial loss, and system instability. Furthermore, accessing copyrighted material illegally is a violation of the law, potentially resulting in legal consequences.

Websites offering free PDFs frequently host malicious content disguised as legitimate files. Avoid suspicious links and prioritize authorized retailers for a safe reading experience. Supporting copyright protects authors and ensures continued creation of valuable literary works. Protect your digital wellbeing – choose legal and secure sources.

Plot Summary: A Detailed Overview

“The Most Dangerous Game” centers on Sanger Rainsford, a renowned big-game hunter who falls overboard his yacht and swims to Ship-Trap Island. He discovers it’s the hunting ground of General Zaroff, a sophisticated aristocrat who has grown bored with hunting animals and now seeks the ultimate prey: humans.

Zaroff forces Rainsford to participate in a deadly game, becoming the hunted instead of the hunter. The rules are simple, yet brutal – Rainsford has a head start, minimal supplies, and must evade Zaroff for three days. This thrilling narrative explores themes of survival, morality, and the blurred lines between hunter and hunted, creating a suspenseful and thought-provoking story.

Rainsford’s Initial Journey and Shipwreck

Sanger Rainsford, a celebrated big-game hunter, is traveling to Rio de Janeiro to embark on a jaguar hunt. He and his companion, Whitney, discuss the feelings of the hunted, a conversation foreshadowing Rainsford’s impending fate. While sailing through the Caribbean Sea, Rainsford hears a mysterious sound – gunfire – emanating from Ship-Trap Island.

Driven by curiosity, he attempts to get a better view, leading to a tragic accident. Rainsford loses his balance and falls overboard. Despite Whitney’s attempts to locate him, Rainsford disappears into the darkness, eventually swimming towards the ominous, isolated Ship-Trap Island, unaware of the horrors that await him.

Upon reaching Ship-Trap Island, Rainsford is surprisingly welcomed by General Zaroff, a sophisticated and cultured Russian aristocrat. Zaroff reveals he shares Rainsford’s passion for hunting, but has grown bored with traditional game. He explains he now hunts the most dangerous prey of all: humans.

Zaroff lures ships to the island, rescuing survivors only to hunt them for sport. He offers Rainsford a choice: join the hunt or become the hunted; Faced with this terrifying ultimatum, Rainsford reluctantly accepts the challenge, initiating a deadly game of cat and mouse across the treacherous island.

The Rules of the Game: A Morally Gray Conflict

Zaroff establishes a chilling set of rules for the hunt, granting Rainsford a hunting knife and a three-hour head start. If Rainsford can evade Zaroff for three days, he will be allowed to leave the island. However, if captured, he faces certain death.

The conflict isn’t simply a physical struggle; it’s a profound exploration of morality. Zaroff justifies his actions with a twisted philosophy, believing that animals lack the capacity for reason and therefore don’t deserve ethical consideration. This raises unsettling questions about the boundaries of sport, civilization, and the inherent value of life, creating a morally ambiguous landscape.

Character Analysis: Key Players

The story centers around three pivotal characters: Sanger Rainsford, a renowned big-game hunter; General Zaroff, a sophisticated and enigmatic aristocrat; and Ivan, Zaroff’s imposing and silent servant. Rainsford embodies the conventional hunter, initially confident in his skills, but forced to confront a terrifying reversal of roles.

Zaroff represents a chilling perversion of civilized values, masking his predatory nature behind a veneer of refinement. Ivan, physically formidable and utterly loyal, serves as Zaroff’s enforcer, adding to the atmosphere of dread. The Most Dangerous Game PDF allows readers to closely examine their motivations and interactions.

Sanger Rainsford: The Big-Game Hunter

Rainsford is initially presented as a skilled and experienced hunter, confident in his abilities and understanding of the natural world. He possesses a pragmatic and somewhat detached perspective on hunting, viewing animals as legitimate targets for sport. However, his perspective dramatically shifts when he becomes the hunted.

The Most Dangerous Game PDF reveals Rainsford’s resourcefulness and adaptability as he utilizes his hunting knowledge to survive Zaroff’s deadly game. He demonstrates courage, cunning, and a willingness to employ any means necessary to outwit his pursuer. His transformation highlights the story’s exploration of predator and prey dynamics.

General Zaroff: The Sophisticated Antagonist

Zaroff embodies a chilling blend of refinement and ruthlessness. A wealthy and aristocratic Cossack, he possesses impeccable manners, a vast knowledge of hunting, and a seemingly civilized demeanor. However, beneath this polished exterior lies a profound boredom with traditional hunting, leading him to seek the ultimate challenge: hunting humans.

The Most Dangerous Game PDF showcases Zaroff’s intellectual arrogance and his belief in his own superiority. He justifies his actions through a twisted philosophy, arguing that humans are the only animals capable of providing a truly stimulating hunt. His character serves as a disturbing exploration of unchecked power and moral decay.

Ivan: Zaroff’s Loyal and Imposing Servant

Ivan, a formidable and largely silent figure, is General Zaroff’s deaf-mute servant. Described as immense and powerfully built, he is a physical embodiment of Zaroff’s control and a terrifying enforcer of the “game.” The Most Dangerous Game PDF reveals Ivan’s unwavering loyalty, carrying out Zaroff’s orders without question or hesitation, adding to the unsettling atmosphere of the island.

Though lacking dialogue, Ivan’s presence is deeply menacing. He’s a constant reminder of the danger Rainsford faces, a silent specter tracking the hunted. His imposing stature and brutal efficiency highlight the dehumanizing aspects of Zaroff’s twisted pastime and the lengths to which he’ll go to maintain it.

Themes Explored in “The Most Dangerous Game”

Exploring a The Most Dangerous Game PDF reveals Connell masterfully examines complex themes. The story delves into the blurred lines between civilization and savagery, questioning what separates humans from beasts. The ethics of hunting, particularly when the prey is human, are rigorously challenged, prompting readers to confront uncomfortable moral questions.

A central theme is the predator-versus-prey dynamic, presented not merely as a physical struggle, but as a psychological one. Connell explores the thrill of the hunt, the justifications for dominance, and the consequences of unchecked power. The narrative forces contemplation on the nature of good and evil, and the potential for darkness within us all.

The Nature of Civilization and Savagery

Accessing a The Most Dangerous Game PDF allows a close examination of Connell’s exploration of civilization versus savagery. Rainsford, a big-game hunter, embodies civilized hunting practices, yet is forced to become the hunted, tapping into primal instincts for survival.

Zaroff, representing a corrupted aristocracy, believes he’s transcended societal norms, justifying his deadly game as a refinement of the hunt. However, his actions reveal a descent into barbarism. The island itself symbolizes a place outside civilization’s constraints, where base instincts reign. Connell suggests that the veneer of civilization is thin, easily stripped away when confronted with extreme circumstances, revealing the savage within.

The Ethics of Hunting and Sport

A The Most Dangerous Game PDF facilitates a critical analysis of Connell’s commentary on hunting ethics. Rainsford initially views hunting as a legitimate sport, but Zaroff’s perverse game challenges this perspective; Zaroff argues his hunt is superior, offering a worthy opponent, yet it’s fundamentally unethical due to the suffering inflicted.

Connell questions the morality of deriving pleasure from another being’s fear and death. The story highlights the power imbalance inherent in hunting and the potential for sport to devolve into cruelty. By presenting a hunter becoming the hunted, Connell forces readers to confront the ethical implications of the pursuit, questioning what truly constitutes a “sporting” challenge.

Predator vs. Prey: A Psychological Battle

Accessing a The Most Dangerous Game PDF allows deep exploration of the story’s central psychological conflict. The narrative transcends a simple physical chase, becoming a battle of wits and wills between Rainsford and Zaroff. Rainsford’s survival hinges not only on his hunting skills but also on his ability to understand and exploit Zaroff’s psychology.

Zaroff’s enjoyment stems from the intellectual challenge of hunting a creature capable of reason, while Rainsford’s desperation fuels his resourcefulness. Connell masterfully portrays the shifting power dynamics, as Rainsford gradually adopts predatory tactics to survive. This psychological warfare elevates the story beyond a typical thriller, examining the primal instincts within both hunter and hunted.

Adaptations of “The Most Dangerous Game”

Finding a The Most Dangerous Game PDF often sparks interest in its various adaptations. The story’s enduring appeal has led to numerous film and television versions, each interpreting Connell’s narrative with unique creative choices. Early film adaptations explored the core premise, while more recent iterations, like the Peacock series, significantly expand upon the original short story.

These adaptations demonstrate the story’s adaptability and continued relevance. Accessing the original PDF allows for direct comparison with these adaptations, highlighting changes in plot, character development, and thematic emphasis. The Peacock series, with its two seasons, represents a substantial reimagining, prompting discussion about fidelity to the source material.

Film Adaptations: A History of Screen Versions

Numerous film adaptations of “The Most Dangerous Game” exist, beginning with a low-budget 1932 version starring Joel McCrea and Fay Wray. This early adaptation established the core conflict, though it differed significantly from Connell’s original short story. Later, a 1956 film featuring Ivan Tors offered another take, further popularizing the premise.

Accessing a The Most Dangerous Game PDF provides a crucial baseline for comparing these cinematic interpretations. Each adaptation introduces unique directorial choices and stylistic flourishes. Examining these versions alongside the source material reveals how filmmakers have interpreted and reimagined Connell’s thrilling narrative over decades, influencing subsequent thriller and action genres.

Television Series: The Recent Peacock Adaptation (Season 1 & 2)

Peacock’s recent adaptation, created by Nick Santora, Josh Harmon, and Scott Elder, significantly expands upon Richard Connell’s 1924 short story. Released in 2023 (Season 1) and 2024 (Season 2), the series offers a more complex narrative, delving into character backstories and broadening the scope of the hunt.

A The Most Dangerous Game PDF serves as a vital reference point when analyzing the series’ deviations and expansions. The show’s success has sparked renewed interest in the original text, prompting many to seek out digital versions for comparative study. The series’ intricate plot and character development offer a compelling modern interpretation.

“The Most Dangerous Game” Season 3: Release Date Speculation

Following the cliffhanger ending of Season 2, fans eagerly anticipate news regarding a potential third season. While Peacock has not officially announced a renewal, speculation is rife online. Accessing a The Most Dangerous Game PDF allows viewers to revisit the source material and consider potential storylines for future episodes.

Considering the production timeline of previous seasons, a late 2025 or early 2026 release seems plausible, assuming a green light is given soon. The series’ creators may draw further inspiration from Connell’s original work, potentially exploring themes not yet addressed.

Analyzing the Peacock Series vs. the Original Story

The Peacock adaptation significantly expands upon Richard Connell’s concise 1924 short story. A The Most Dangerous Game PDF reveals the original’s focus on a purely psychological and physical battle between Rainsford and Zaroff, unfolding rapidly on the island. The series, however, delves into extensive backstories for both characters, enriching their motivations.

While the core premise of the hunt remains, the television show introduces complex political and familial elements absent in the original text. This expansion allows for a more serialized narrative, but also deviates from Connell’s streamlined, suspenseful tale. Examining both versions highlights the strengths of each medium.

Changes to the Plot and Characters

Compared to a The Most Dangerous Game PDF of the original short story, the Peacock series introduces substantial plot alterations. The show expands the scope beyond a simple hunt, incorporating elements of conspiracy and political intrigue surrounding Zaroff’s background and island operations; Rainsford’s character also receives a more detailed backstory, exploring his trauma and motivations.

Significant changes include the introduction of new characters and subplots, absent in Connell’s focused narrative. The series also alters the ending, providing a more ambiguous resolution than the original’s decisive conclusion. These modifications aim to create a longer, more complex storyline for a television audience.

Expansion of the World and Backstories

Unlike a concise The Most Dangerous Game PDF version, the Peacock adaptation dramatically expands the world established by Richard Connell. Zaroff’s island isn’t merely a hunting ground; it’s presented as a sophisticated, self-contained operation with a network of resources and personnel. The series delves into the history of the island and its purpose, adding layers of complexity.

Furthermore, character backstories are richly developed. Rainsford’s past trauma and Zaroff’s descent into his twisted ideology are explored in detail, providing context for their actions. This expansion aims to create a more immersive and psychologically driven narrative, moving beyond the original’s streamlined focus.

Critical Reception and Fan Reactions

Initial responses to the Peacock series, diverging from the original The Most Dangerous Game PDF source material, were mixed. Critics acknowledged the strong performances and heightened suspense, but some lamented the significant departures from Connell’s concise narrative. Many felt the expanded storylines diluted the core thematic tension.

Fan reactions mirrored this divide. While some appreciated the deeper character explorations and broadened world-building, others expressed disappointment with the alterations to the plot and the introduction of new elements. Discussions centered on whether the series successfully honored the spirit of the original short story or strayed too far, becoming a different entity altogether.

The Enduring Legacy of “The Most Dangerous Game”

Despite being a short story published in 1924, The Most Dangerous Game PDF continues to resonate with audiences today. Its influence is palpable in modern thrillers and action films, frequently inspiring narratives centered around cat-and-mouse dynamics and the blurring lines between hunter and hunted.

The story’s exploration of morality, civilization versus savagery, and the ethics of sport remains remarkably relevant, sparking ongoing discussions about human nature and the justifications for violence. The enduring appeal lies in its concise yet powerful examination of these complex themes, ensuring its place as a cornerstone of adventure literature.

Influence on Modern Thrillers and Action Films

The core premise of The Most Dangerous Game PDF – a hunter becoming the hunted – has profoundly impacted modern thrillers and action cinema. Films like “Predator” (1987) and “The Hunger Games” franchise clearly echo Connell’s narrative structure, featuring protagonists forced into desperate survival scenarios against skilled adversaries.

The psychological tension and moral ambiguity inherent in the story are also frequently replicated, exploring the predatory instincts within humanity. Even beyond direct adaptations, the story’s influence can be seen in countless narratives involving high-stakes chases, resourceful protagonists, and antagonists who relish the hunt, solidifying its lasting impact.

Continued Relevance in Discussions of Morality

Exploring the themes within The Most Dangerous Game PDF continues to spark debate about the ethics of power, sport, and the very definition of humanity. The story forces readers to confront uncomfortable questions about the justification of violence and the blurring lines between civilization and savagery.

Zaroff’s rationale for hunting humans – deeming them the ultimate game – challenges conventional moral boundaries, prompting reflection on empathy and the inherent value of life. The narrative’s enduring power lies in its ability to provoke these discussions, remaining remarkably relevant in contemporary ethical considerations and philosophical inquiries.

Resources for Further Study and Analysis

For deeper engagement with The Most Dangerous Game PDF, numerous academic resources are available. JSTOR and Project MUSE offer scholarly articles analyzing the story’s themes and literary techniques. Websites dedicated to classic literature, like SparkNotes and CliffsNotes, provide plot summaries, character analyses, and critical essays.

Exploring biographical information on Richard Connell through Britannica and literary databases enhances understanding of his influences. Furthermore, examining adaptations – particularly the Peacock series – alongside the original text fosters critical thinking. Online forums and literary communities provide platforms for discussing interpretations and sharing insights into this enduring work.

fundamental accounting principles 25th edition pdf

Fundamental Accounting Principles 25th Edition PDF: Article Plan

This article details accessing the 25th edition of “Fundamental Accounting Principles” in PDF format, exploring legality, sources like YakiBooki and Project Gutenberg, and supplemental resources.

It will cover key features, core principles, and the accounting cycle, aiding students and professionals seeking this vital textbook for accounting education and practice.

The pursuit of knowledge in accounting often begins with a solid foundation, and for many, that foundation is laid with “Fundamental Accounting Principles.” This textbook, now in its 25th edition, remains a cornerstone resource for students and professionals alike.

However, access to the latest edition can present challenges, particularly regarding cost and availability. This article serves as a comprehensive guide to navigating the landscape of the “Fundamental Accounting Principles 25th Edition,” with a specific focus on locating and utilizing the PDF version.

We will explore legitimate avenues for obtaining the PDF, address concerns surrounding the legality of downloads, and highlight alternative resources that can supplement your learning. The information presented here, gathered as of December 5th, 2025, aims to empower you with the knowledge to effectively study and apply accounting principles.

From Project Gutenberg to digital publishing platforms, we’ll examine various options, including user recommendations like YakiBooki, to help you find the resources you need.

What is Fundamental Accounting Principles?

“Fundamental Accounting Principles” is a widely recognized and respected textbook designed to introduce the core concepts of financial and managerial accounting. It’s a comprehensive resource covering the entire accounting cycle, from initial transactions to the preparation of crucial financial statements.

The book emphasizes a clear and concise explanation of accounting principles, making it accessible to both beginners and those with some prior knowledge. It aims to build a strong understanding of the underlying logic and reasoning behind accounting practices.

The 25th edition builds upon decades of refinement, ensuring its content remains relevant and aligned with current accounting standards. Students utilize it to grasp the accounting equation, debits and credits, and the intricacies of financial reporting.

Finding a PDF version allows for convenient study, offering portability and accessibility across various devices, though legality must be carefully considered, as discussed later in this guide.

Authors: John J. Wild and Ken W. Shaw

John J. Wild and Ken W. Shaw are highly esteemed authors in the field of accounting education, renowned for their collaborative work on “Fundamental Accounting Principles.” Their combined expertise has shaped generations of accounting students, providing a solid foundation in the discipline.

Wild, a distinguished professor emeritus, brought decades of teaching experience and a commitment to clarity. Shaw, also a respected academic, contributed significantly to the book’s practical applications and real-world examples.

Together, they crafted a textbook that balances theoretical rigor with practical relevance, making complex accounting concepts understandable. The 25th edition reflects their ongoing dedication to updating the material to reflect evolving accounting standards and practices.

Their commitment to accessible learning is a key reason why “Fundamental Accounting Principles” remains a popular choice for introductory accounting courses, and why finding a PDF version is sought after by many students.

Key Features of the 25th Edition

The 25th edition of “Fundamental Accounting Principles” boasts several key enhancements designed to improve the learning experience. Updated content reflects the latest accounting standards and regulations, ensuring students are prepared for current professional practices.

Numerous real-world examples and case studies are integrated throughout the text, illustrating how accounting principles are applied in practical business scenarios. These examples enhance comprehension and critical thinking skills.

Improved clarity and organization make complex topics more accessible, with a focus on simplifying explanations without sacrificing accuracy. Interactive learning tools, often available with digital versions or through supplemental materials, further aid understanding.

The textbook also includes a strengthened emphasis on ethical considerations in accounting, preparing students for the professional responsibilities they will encounter. Accessing a PDF version allows for convenient study and note-taking.

Why Use the 25th Edition Textbook?

Choosing the 25th edition of “Fundamental Accounting Principles” provides a robust foundation in accounting knowledge. Its comprehensive coverage ensures students grasp core concepts, from the accounting equation to complex financial statement analysis. The updated content aligns with current industry standards, making it invaluable for both academic success and future career prospects.

The textbook’s clear and concise writing style simplifies challenging topics, fostering a deeper understanding. Practical examples and case studies bridge the gap between theory and real-world application, enhancing problem-solving abilities.

A PDF version offers unparalleled convenience, allowing students to study anytime, anywhere, and on any device. Digital access facilitates easy searching, highlighting, and note-taking, optimizing the learning process. It’s a vital resource for anyone pursuing accounting education or professional development.

Availability of the PDF Version

Finding a PDF version of “Fundamental Accounting Principles, 25th Edition” requires careful consideration of legality. While convenient, unauthorized downloads infringe on copyright laws. Several avenues exist, ranging from legitimate online bookstores offering digital copies to platforms facilitating file sharing.

Sources like YakiBooki have been mentioned as potential providers, though users should verify the legitimacy of any download before proceeding. Project Gutenberg, while a valuable resource for public domain works, is unlikely to host copyrighted textbooks like this one.

Digital publishing platforms offer interactive eBook formats, often with subscription or purchase options. Always prioritize legal and ethical access to ensure you’re supporting authors and publishers. Beware of websites promising “free PDF downloads” that may contain malware or violate copyright.

Legality of PDF Downloads

Downloading a PDF of “Fundamental Accounting Principles, 25th Edition” without proper authorization is generally illegal. Copyright law protects the authors and publisher, granting them exclusive rights to distribute their work. Unauthorized reproduction and distribution constitute copyright infringement, potentially leading to legal consequences.

Accessing the textbook through legitimate channels is crucial. This includes purchasing a digital copy from authorized online retailers or subscribing to platforms offering access to educational materials. Utilizing library resources, if available, provides a legal and cost-effective alternative.

Free PDF downloads from unofficial sources often violate copyright and may expose users to security risks, such as malware or viruses. Supporting authors and publishers by obtaining the textbook legally ensures continued access to quality educational resources.

Sources for PDF Download

Locating a PDF of “Fundamental Accounting Principles, 25th Edition” requires careful consideration of legality. While numerous websites claim to offer free downloads, many are unreliable or infringe on copyright. YakiBooki is mentioned as a potential source, based on user reports, but its legitimacy should be independently verified.

Project Gutenberg, a repository of free eBooks, is unlikely to host copyrighted textbooks like this one, focusing primarily on public domain works. Digital publishing platforms may offer access through subscription or purchase, providing a legal alternative.

Caution is advised when exploring unofficial download sites. These often contain malware or lead to deceptive advertising. Prioritize authorized retailers and educational platforms to ensure a safe and legal download experience. Always scan downloaded files with antivirus software.

Core Accounting Principles Covered

“Fundamental Accounting Principles, 25th Edition” comprehensively covers the bedrock concepts of financial accounting. This includes a detailed exploration of the accounting equation – Assets = Liabilities + Equity – forming the foundation for understanding financial position. The text meticulously explains debits and credits, their application in journal entries, and their impact on the accounting system.

Students will gain a thorough understanding of the complete accounting cycle, from transaction analysis to the preparation of crucial financial statements. Key principles like the matching principle, revenue recognition, and the going concern assumption are thoroughly examined.

The book also delves into topics like depreciation, inventory valuation, and the complexities of internal controls, providing a robust foundation for both academic study and professional practice.

The Accounting Equation

At the heart of “Fundamental Accounting Principles, 25th Edition” lies the accounting equation: Assets = Liabilities + Equity. This fundamental principle demonstrates the balance that must always exist between what a company owns (assets) and how those assets are financed (liabilities and equity). The textbook provides extensive examples illustrating how every transaction impacts this equation, maintaining its equilibrium.

Students learn to analyze business events and determine their effect on individual elements – increasing or decreasing assets, liabilities, or equity. The 25th edition emphasizes the importance of understanding this equation as the basis for all financial reporting.

Detailed explanations and practice problems solidify comprehension, enabling students to confidently apply the equation to real-world accounting scenarios and accurately represent a company’s financial position.

Debits and Credits Explained

“Fundamental Accounting Principles, 25th Edition” dedicates significant attention to debits and credits, the core of the double-entry bookkeeping system. The text clarifies that debits don’t always mean increases and credits don’t always mean decreases; their effect depends on the account type – asset, liability, equity, revenue, or expense.

The book utilizes a clear, expanded accounting equation approach to illustrate how debits and credits maintain balance. Numerous examples and diagrams demonstrate the rules for each account type, helping students master this often-challenging concept.

The 25th edition reinforces understanding through practice exercises, allowing students to apply the rules and build confidence in recording transactions accurately. This foundational knowledge is crucial for comprehending the entire accounting cycle and financial statement preparation.

The Accounting Cycle

“Fundamental Accounting Principles, 25th Edition” provides a comprehensive walkthrough of the accounting cycle, from initial transaction analysis to the creation of financial statements. The textbook breaks down each step – journalizing, posting to the ledger, preparing a trial balance, making adjusting entries, and closing the books – with detailed explanations and illustrative examples.

The 25th edition emphasizes the interconnectedness of each stage, demonstrating how errors in one step can impact subsequent processes. It also highlights the importance of internal controls throughout the cycle to ensure accuracy and prevent fraud.

Readers benefit from real-world case studies integrated within the cycle’s explanation, solidifying their understanding of practical application. This thorough coverage prepares students for advanced accounting coursework and professional practice.

Financial Statements: Overview

“Fundamental Accounting Principles, 25th Edition” dedicates significant attention to mastering financial statement preparation and analysis. The textbook provides a clear overview of the three primary statements: the Income Statement, Balance Sheet, and Statement of Cash Flows, explaining their purpose and interrelationships.

It details how each statement reflects a different aspect of a company’s financial performance and position. The 25th edition emphasizes the importance of understanding the underlying accounting principles that govern the recognition and measurement of items reported on these statements.

Readers will learn to interpret key ratios and metrics derived from the financial statements, enabling them to assess a company’s profitability, liquidity, and solvency. Practical examples and case studies enhance comprehension and application of these crucial skills.

Income Statement

The “Fundamental Accounting Principles, 25th Edition” thoroughly explains the Income Statement, detailing its role in reporting a company’s financial performance over a specific period. It clarifies the components of the statement, including revenues, expenses, gains, and losses, and how these elements determine net income or net loss.

The textbook emphasizes the matching principle and accrual accounting, crucial concepts for accurately reflecting profitability. It provides numerous examples illustrating the calculation of gross profit, operating income, and net income, guiding students through the process.

Readers will learn to analyze the Income Statement to assess a company’s profitability trends and identify areas for improvement. The 25th edition also covers various income statement formats and the impact of different accounting methods on reported results.

Balance Sheet

“Fundamental Accounting Principles, 25th Edition” dedicates significant coverage to the Balance Sheet, a cornerstone of financial reporting. It meticulously explains the accounting equation – Assets = Liabilities + Equity – and how this equation underpins the entire statement. The textbook details the classification of assets and liabilities into current and non-current categories, providing clarity for students.

Readers will learn to interpret the Balance Sheet to assess a company’s financial position at a specific point in time. The 25th edition emphasizes the importance of understanding liquidity, solvency, and financial flexibility.

Numerous examples illustrate the presentation of various asset and liability accounts, alongside detailed explanations of equity components. The text also explores the impact of different accounting policies on the Balance Sheet’s presentation and analysis.

Statement of Cash Flows

The “Fundamental Accounting Principles, 25th Edition” provides a comprehensive exploration of the Statement of Cash Flows, detailing its crucial role in assessing a company’s liquidity and solvency. The textbook clearly explains the three main activities: operating, investing, and financing, and how cash flows are categorized within each.

Students gain a thorough understanding of both the direct and indirect methods for presenting cash flows from operating activities, with illustrative examples demonstrating each approach. The 25th edition emphasizes the importance of reconciling net income to cash flow from operations.

Readers learn to analyze the Statement of Cash Flows to evaluate a company’s ability to generate cash, meet its obligations, and fund future growth. The text also covers the disclosure requirements related to cash flow reporting, ensuring a complete understanding of this vital financial statement.

Specific Chapters Commonly Sought

Students and professionals frequently search for specific chapters within the “Fundamental Accounting Principles, 25th Edition” PDF; Chapters focusing on the accounting cycle, particularly those detailing journal entries, ledgers, and trial balances, are consistently in high demand.

The sections covering financial statement analysis, including ratio calculations and interpretation, are also popular, as they provide practical application of accounting principles. Chapters on inventory valuation methods – FIFO, LIFO, and weighted-average – are often sought for their complexity and importance.

Additionally, chapters addressing depreciation, amortization, and the time value of money are frequently requested. Access to these individual chapters, often through online resources or PDF downloads, allows focused study and quick reference for specific accounting challenges.

Understanding the Textbook’s Approach

“Fundamental Accounting Principles, 25th Edition” adopts a clear and comprehensive approach to teaching accounting concepts. It emphasizes a step-by-step methodology, building from basic principles to more complex applications, making it accessible for beginners. The textbook utilizes numerous real-world examples and case studies to illustrate how accounting is applied in practical business scenarios.

It prioritizes understanding the ‘why’ behind accounting rules, not just the ‘how’, fostering critical thinking skills. The authors, Wild and Shaw, integrate technology throughout the text, with online resources and practice problems designed to reinforce learning.

The 25th edition maintains a focus on ethical considerations in accounting, preparing students for professional responsibilities. Its approach aims to equip learners with a solid foundation for success in accounting careers.

Target Audience: Students and Professionals

The “Fundamental Accounting Principles, 25th Edition” primarily targets undergraduate students enrolled in introductory financial and managerial accounting courses. It serves as a core textbook for those beginning their accounting education, providing a foundational understanding of key concepts and principles. However, its comprehensive nature also extends its value to a broader audience.

Professionals seeking a refresher or a solid grounding in accounting fundamentals will find this edition beneficial. Individuals transitioning into accounting roles, or those needing to understand financial statements for business decision-making, can leverage its clear explanations.

The book’s accessibility makes it suitable for self-study, while its detailed coverage supports more advanced learning. Ultimately, anyone requiring a thorough grasp of accounting principles will find this textbook a valuable resource.

Alternative Resources & Supplements

Beyond the core textbook, several resources complement the “Fundamental Accounting Principles, 25th Edition” learning experience. Digital publishing platforms offer interactive publications and online catalogs, potentially providing supplementary materials or practice questions. Exploring these platforms can enhance understanding and offer diverse learning approaches.

While seeking PDF downloads, remember to prioritize legal and ethical sources. Project Gutenberg, with its extensive free eBook library, might contain related accounting resources, though not necessarily the textbook itself.

Furthermore, publishers often provide online supplements like solution manuals, test banks, and PowerPoint presentations. Investigating the publisher’s website or utilizing resources recommended by instructors can significantly aid comprehension and skill development. Remember YakiBooki was mentioned as a potential source by users.

YakiBooki as a Potential Source

YakiBooki has emerged as a frequently cited platform for acquiring textbooks, including the “Fundamental Accounting Principles, 25th Edition” in PDF format. User testimonials suggest a positive experience, with one individual specifically mentioning a “helpful tip” leading them to YakiBooki for a quick delivery of the book.

However, it’s crucial to exercise caution and due diligence when utilizing such platforms. Verify the legitimacy of the source and ensure compliance with copyright regulations before downloading any materials. While users report success, the legality and security of downloads from YakiBooki should be independently assessed.

Further investigation into YakiBooki’s terms of service and user reviews is recommended. Consider alternative, legally sanctioned avenues for obtaining the textbook before resorting to potentially questionable sources.

Project Gutenberg and Free eBooks

Project Gutenberg is a well-established online library offering over 60,000 free eBooks, primarily focusing on works in the public domain. While a valuable resource for classic literature, it’s unlikely to host a recent textbook like “Fundamental Accounting Principles, 25th Edition” due to copyright restrictions. Textbooks are typically protected by copyright for a significant period.

The availability of current editions of specialized academic texts on Project Gutenberg is extremely limited. The platform’s strength lies in older, copyright-expired materials. Searching for the specific textbook title will likely yield no results.

However, Project Gutenberg remains a useful resource for foundational accounting texts or historical materials related to the field. It’s a good starting point for exploring the evolution of accounting principles, but not for obtaining the latest edition of a core textbook.

Digital Publishing Platforms

Various digital publishing platforms allow document conversion and online sharing, potentially offering access to “Fundamental Accounting Principles, 25th Edition” in a digital format. These platforms often facilitate the creation of interactive publications and online catalogs from uploaded documents.

However, directly finding a legally free PDF of the textbook on these platforms is improbable. While users could upload a copy, doing so without proper authorization would constitute copyright infringement. Legitimate access usually requires purchase or subscription.

These platforms are more useful for accessing supplementary materials or study guides created by other users, rather than the core textbook itself. Exploring these resources might offer alternative learning aids, but always verify the legality of any downloaded content.

Accessing and Utilizing the 25th Edition

Securing a PDF copy of “Fundamental Accounting Principles, 25th Edition” requires careful consideration of legality. While free download options exist, many pose copyright risks. Purchasing directly from the publisher or authorized retailers remains the most secure and ethical approach.

Exploring platforms like YakiBooki offers potential, but user discretion is vital. Project Gutenberg and similar sites are unlikely to host this specific textbook due to copyright restrictions. Remember to prioritize legitimate sources to support authors and publishers.

Once obtained, effectively utilizing the textbook involves consistent study and practice. Supplementing with online resources and practice problems will enhance understanding. This 25th edition provides a strong foundation for accounting principles, benefiting both students and professionals.

table saw sled plans pdf

Table Saw Sled Plans PDF: A Comprehensive Guide

Discover detailed table saw sled plans in PDF format, offering step-by-step instructions, cut diagrams, and 3D visualizations for DIY woodworking projects.

John Malecki provides a FREE 10-page PDF download, while Instructables hosts numerous guides with pictures, detailing sled construction and modifications.

Access resources for building crosscut, miter, and combination sleds, enhancing precision and safety in your table saw operations.

Table saw sleds are invaluable DIY tools for woodworkers, dramatically improving accuracy and safety when making precise cuts. These jigs slide within the table saw’s miter slots, offering enhanced control, particularly for crosscuts and miter cuts.

Sleds provide a stable platform, minimizing the risk of workpiece movement during cutting. They are especially useful for smaller pieces or when cutting angles. PDF plans simplify construction, offering detailed instructions and cut lists.

Woodworkers utilize sleds to achieve repeatable, high-quality results, and free plans from sources like John Malecki and Instructables make building one accessible to all skill levels.

Why Use a Table Saw Sled?

Table saw sleds significantly enhance woodworking precision, especially for crosscuts and miter cuts where accuracy is paramount. They eliminate the need to awkwardly maneuver workpieces directly on the table saw, improving safety and control.

Sleds minimize kickback risk, a common hazard when cutting smaller pieces. Utilizing PDF plans ensures consistent, repeatable results, crucial for projects requiring identical components.

DIY construction, guided by resources like Instructables and John Malecki’s free plans, allows customization to specific needs. A well-built sled transforms challenging cuts into manageable, accurate tasks.

Types of Table Saw Sleds

Table saw sleds come in various designs, each suited for specific cutting tasks. Crosscut sleds excel at making accurate, square cuts across the width of a board, often featuring a robust fence.

Miter sleds are designed for angled cuts, ideal for picture frames or trim work, and rely on precise angle adjustments. Combination sleds, as seen on Instructables, merge functionalities, offering both crosscutting and miter capabilities in a single unit.

PDF plans often detail variations within these types, including options for adding features like flip stops or rail systems. Choosing the right sled depends on your project needs and available table saw features.

Crosscut Sleds

Crosscut sleds are fundamental for achieving precise 90-degree cuts, enhancing accuracy beyond a table saw’s standard fence. PDF plans, like those from John Malecki and Instructables, emphasize a sturdy base sliding within the table saw’s miter slots.

Construction typically involves creating runners that fit snugly, yet move freely – the “dime test” ensures smooth operation. The fence, a critical component, provides a reference surface for consistent cuts.

These sleds are invaluable for safely cutting large panels or smaller pieces requiring high precision. Detailed PDF guides illustrate base construction, runner installation, and fence assembly for optimal performance.

Miter Sleds

Miter sleds excel at making accurate angled cuts, crucial for projects like picture frames or trim work. PDF plans readily available online detail constructing a sled that pivots within the table saw’s miter slots, allowing for precise angle adjustments.

Instructables showcases designs where the sled base supports a fence with an adjustable angle indicator. This ensures repeatable miter cuts. The runners, similar to crosscut sleds, require a smooth, friction-free glide.

PDF guides often include instructions for building a locking mechanism to secure the desired angle. These sleds significantly improve the accuracy and safety of angled cuts on a table saw.

Combination Sleds

Combination sleds represent the ultimate versatility, merging the functionality of both crosscut and miter sleds into a single unit. PDF plans for these often feature a base designed to accommodate interchangeable fences – one for 90-degree crosscuts and another adjustable for mitered angles.

Instructables demonstrates builds where a single sled base supports a fence that can be quickly swapped or adjusted. This eliminates the need for multiple sleds, saving space and streamlining workflow.

PDF guides emphasize the importance of precise runner alignment and a robust locking system for the miter fence. These sleds offer maximum flexibility for various woodworking tasks.

Essential Materials and Tools

Building a table saw sled requires quality wood, typically MDF or plywood, alongside tools like a table saw, rulers, squares, and clamps for precise assembly.

Wood Selection for Sled Construction

Choosing the right wood is crucial for a stable and accurate table saw sled. MDF (Medium-Density Fiberboard) is a popular choice due to its flatness and affordability, minimizing warping and ensuring smooth runner contact; However, MDF doesn’t hold screws as well as wood.

Plywood, particularly Baltic birch, offers excellent strength and screw-holding capabilities, making it suitable for the base and fence. Solid wood can also be used, but requires careful selection to avoid warping.

Consider the thickness; ¾ inch material is common for both the base and fence, providing sufficient rigidity. The runners often benefit from a harder wood like maple for durability and reduced wear. Prioritize flatness and stability when selecting your materials for optimal sled performance.

Tools Required for Building a Sled

Constructing a table saw sled requires a blend of essential woodworking tools. Naturally, a table saw is fundamental for cutting the base, runners, and fence components accurately. Measuring tools like rulers and squares are vital for precise dimensions and ensuring squareness throughout the build.

Clamps are indispensable for securely holding pieces together during glue-ups and assembly. A miter saw or hand saw assists in cutting runners and fence pieces to length. A drill/driver is needed for screw fastening.

Additionally, sandpaper and a sanding block are essential for smoothing edges and surfaces. Depending on the plan, you might need a router for creating rabbets or grooves. Safety gear, including safety glasses, is non-negotiable.

Table Saw

A table saw is the cornerstone tool for building a table saw sled, enabling precise and straight cuts crucial for the base, runners, and fence. The saw’s miter slots are fundamental, as the sled’s runners will glide within them, ensuring accurate crosscuts and mitered angles.

Accuracy is paramount; ensure your table saw blade is properly aligned and the fence is parallel to the blade. Utilizing a sharp blade minimizes tear-out and delivers cleaner cuts. The sled’s dimensions are often dictated by the table saw’s size and slot spacing.

Safety features, like a blade guard and anti-kickback pawls, should be utilized whenever possible during sled construction.

Measuring Tools (Rulers, Squares)

Precise measurements are absolutely critical when constructing a table saw sled. A high-quality ruler, preferably with markings in both inches and millimeters, is essential for accurately cutting the sled base, runners, and fence components. A combination square ensures right angles and helps verify the squareness of the assembled sled.

Accuracy in measuring the runner width and depth is vital for smooth gliding within the table saw’s miter slots. Using a digital angle finder can assist in achieving precise miter angles for specialized sleds.

Double-checking all measurements before cutting is highly recommended to avoid costly errors and ensure a functional, accurate sled.

Clamps

Clamps are indispensable for securely holding sled components together during glue-up. Various types, including bar clamps, pipe clamps, and spring clamps, prove useful depending on the specific joint being assembled. Bar clamps are ideal for applying even pressure across larger surfaces like the sled base and runners.

Pipe clamps offer extended reach for wider sleds, while spring clamps are handy for temporarily securing smaller pieces. Ensuring adequate clamping pressure is crucial for strong, durable joints.

Protecting the wood surface from clamp marks with clamp pads is advisable. Consistent clamping pressure guarantees a flat, stable sled base and prevents warping during the drying process.

Building a Basic Crosscut Sled: Step-by-Step

Follow detailed PDF plans to cut the sled base and runners, ensuring smooth movement using the dime test. Assemble and construct a sturdy fence.

Cutting the Sled Base

Begin by precisely cutting the sled base to the desired dimensions, typically around 24 inches in length to match the table saw’s depth. Utilize a table saw for accurate and straight cuts, ensuring the base is perfectly rectangular. Refer to your chosen PDF plans for specific measurements tailored to your saw and project needs.

Consider the material thickness when determining the base size; ¾ inch plywood is a common choice. Prioritize a flat and stable base for optimal sled performance. Double-check all measurements before making the final cuts, as accuracy is crucial for smooth runner alignment. Inspect the cut edges for any imperfections and sand them down for a clean surface.

Remember that the base serves as the foundation for the entire sled, so a well-cut base is essential for achieving precise crosscuts.

Creating the Runners

Crafting the runners is vital for smooth and accurate sled movement within the table saw’s miter slots. Cut the runner material – often hardwood – to the appropriate length, ensuring they extend slightly beyond the sled base. Aim for a thickness that allows the runners to sit just below the table surface when assembled.

Precision is key; runners must be parallel and free of twists. Instructables guides suggest cutting runners to 24 inches, but verify with your PDF plans. Ensure the runners slide effortlessly within the miter slots without excessive play. The dime test – placing dimes in the slot and checking runner clearance – is a helpful technique for achieving the correct fit.

Smooth runner surfaces are essential for minimizing friction and ensuring accurate cuts.

Ensuring Smooth Runner Movement (Dime Test)

The dime test is a crucial step in verifying proper runner fit within your table saw’s miter slots. Stack two dimes high within each slot, creating a precise gauge. Carefully place a runner on top of the dimes.

Ideally, the runner should rest snugly on the dimes without compressing them significantly. If the dimes are easily compressed, the runner is too low, potentially causing instability; Conversely, if the runner doesn’t sit flush, it’s too high, hindering smooth movement.

Adjust the runner thickness accordingly through sanding or planing until the dime test is passed for both runners. This ensures minimal resistance and side-to-side movement, vital for accurate cuts as detailed in Instructables guides and PDF plans.

Assembling the Sled Base and Runners

Begin by applying wood glue to the edges of the sled base where the runners will attach. Ensure the runners are aligned flush with the bottom surface of the base, maintaining a 90-degree angle for accurate cuts. Secure the runners using clamps, applying even pressure along their entire length.

Allow the glue to dry completely, typically for several hours, as per the glue manufacturer’s instructions. Reinforce the connection with screws, pre-drilling pilot holes to prevent splitting the wood. Countersink the screws for a smooth surface.

Double-check the runner alignment after assembly, verifying they slide smoothly within the table saw’s miter slots, referencing Instructables and PDF plans for guidance.

Constructing the Fence

Begin by cutting the fence material to the desired length, considering the overall sled size and intended use. Many plans, like those found on Instructables, suggest a length slightly longer than the sled base for versatility. Create a 3/4 x 3/4 rabbet cut into one edge of the fence, allowing for secure attachment of accessories or a rail system.

Attach the fence to the sled base using screws and wood glue, ensuring it’s perfectly perpendicular to the sled base for accurate 90-degree cuts. Reinforce the connection with corner braces if desired.

Refer to John Malecki’s PDF plans for detailed dimensions and assembly techniques, ensuring a robust and precise fence construction.

Advanced Sled Features & Modifications

Enhance your table saw sled with features like flip stops and rail systems, detailed in PDF plans and Instructables guides, for increased precision and efficiency.

Adding a Flip Stop

Implementing a flip stop on your table saw sled dramatically improves accuracy for repetitive cuts. Numerous PDF plans and online resources, like those found on Instructables, demonstrate various flip stop designs and installation methods.

These plans often detail how to create a robust flip stop mechanism using readily available materials. The flip stop securely locks into place, ensuring consistent lengths for multiple workpieces.

Consider incorporating a flip stop that allows for micro-adjustments, further refining your precision. PDF guides frequently showcase techniques for building adjustable flip stops, maximizing versatility. Properly installed, a flip stop transforms your sled into a highly efficient cutting tool.

Incorporating a Rail System

Enhance your table saw sled’s functionality by incorporating a rail system. Several PDF plans detail methods for attaching rails, often utilizing aluminum extrusion for superior durability and smoothness. This addition allows for even more precise and consistent cuts, especially when dealing with larger workpieces.

Instructables showcases examples of sleds with integrated rail systems, demonstrating how to create a 3/4 x 3/4 rabbet to securely mount the rails to the sled’s fence.

A rail system provides a stable guide for accessories and can be customized to accommodate various sled features. PDF guides often include detailed diagrams illustrating the rail installation process, ensuring a professional and accurate result.

Building a Rabbet for Fence Attachments

Creating a rabbet on your table saw sled’s fence is crucial for securely attaching various accessories, like flip stops or additional fence sections. PDF plans frequently illustrate this process, emphasizing precision for optimal performance.

Instructables provides guidance on achieving a clean rabbet using multiple passes on the table saw. A common dimension is 3/4 x 3/4, offering a robust mounting surface. Accurate rabbet dimensions ensure a flush fit and prevent movement during operation.

Detailed PDF guides often include specific table saw setup instructions and safety precautions for cutting rabbets. This feature significantly expands the sled’s versatility and customization options.

Finding and Utilizing PDF Plans

Explore readily available PDF plans online, including John Malecki’s free resource, offering cut diagrams, parts lists, and 3D assembly guides for table saw sleds.

Free PDF Plans Available Online (John Malecki Example)

John Malecki offers a valuable, free PDF download for a 2-in-1 crosscut sled plan, a fantastic resource for woodworkers of all skill levels. This comprehensive plan spans 10 pages and includes detailed cut diagrams, meticulously organized parts lists, and clear 3D diagrams.

These visuals guide you step-by-step through the entire build process, ensuring accuracy and simplifying assembly. Malecki emphasizes that the table saw is central to any well-equipped workshop, and this sled enhances its functionality.

Accessing this plan allows you to build a versatile sled for precise cuts, improving project quality and efficiency. It’s a great starting point for those seeking a reliable and well-documented table saw sled project.

Understanding Cut Diagrams and Parts Lists

Cut diagrams within table saw sled plans are essential for efficient material usage, visually representing how to maximize yield from your lumber. They illustrate the precise dimensions and angles required for each component, minimizing waste and ensuring accurate cuts.

Parts lists complement these diagrams, providing a detailed inventory of all necessary materials, including wood dimensions, quantities, and sometimes even suggested wood types.

Carefully studying both allows for organized preparation and prevents mid-build interruptions. PDF plans, like those from John Malecki, often integrate these elements seamlessly, offering a clear pathway from raw material to finished sled. Accurate interpretation is key to a successful build!

Interpreting 3D Diagrams for Assembly

3D diagrams in table saw sled plans elevate understanding beyond 2D representations, offering a spatial visualization of the final product and assembly process. These diagrams clarify component relationships, showcasing how pieces connect and interact, reducing ambiguity during construction.

Rotating and examining these views from multiple angles helps anticipate potential challenges and ensures correct orientation of parts. PDF plans frequently utilize 3D models to demonstrate complex joinery or unique features.

John Malecki’s plans, for example, leverage this technology. Mastering the ability to translate these visuals into physical assembly is crucial for a smooth and accurate build, ultimately leading to a functional and precise sled.

Safety Considerations When Using a Table Saw Sled

Prioritize safety with proper sled operation, avoiding kickback, and always wearing safety glasses. A well-built sled enhances control, but caution remains paramount.

Proper Sled Operation Techniques

Ensure the sled runners move freely within the table saw’s miter slots, testing with the “dime test” – runners should glide over stacked dimes without binding. Maintain consistent, controlled pressure when feeding the workpiece through the blade, avoiding excessive force or jerky movements.

Always keep your hands a safe distance from the blade, utilizing push sticks or blocks when necessary. Never reach over or around the blade while the saw is running. Confirm the sled’s fence is securely clamped and aligned with the blade for accurate cuts. Inspect the sled regularly for any damage or wear, addressing issues before use.

Remember to disconnect the power before making adjustments or performing maintenance. Focus on the task at hand, avoiding distractions, and prioritize a stable, balanced stance during operation.

Avoiding Kickback

Kickback, a dangerous occurrence, is minimized with proper sled use. Ensure the workpiece fully supports itself on the sled, preventing it from pinching the blade. Never attempt to cut warped or twisted wood with the sled, as this increases the risk. Maintain a consistent feed rate, avoiding hesitation or sudden stops.

Verify the blade is sharp and properly aligned, as a dull blade requires more force and increases kickback potential. Use a featherboard if necessary to keep the workpiece firmly against the fence. Avoid standing directly in line with the blade’s path.

Regularly inspect the sled for any obstructions or damage that could contribute to kickback. Prioritize safety and understand the risks associated with table saw operation.

Importance of Safety Glasses

Safety glasses are absolutely crucial when operating a table saw, even with a sled. Woodworking generates flying debris – sawdust, wood chips, and potentially even small pieces of the workpiece – all posing a significant risk to your eyes. Impact-resistant lenses are essential to protect against these projectiles.

A sled doesn’t eliminate the need for eye protection; in fact, it can sometimes create more fine dust. Ensure your safety glasses fit snugly and provide adequate coverage, shielding your eyes from all angles. Consider a full face shield for maximum protection during particularly dusty or aggressive cuts.

Never compromise on eye safety. Invest in quality safety glasses and make them a non-negotiable part of your woodworking routine.